This article was created by a teacher at the illustration and manga school, egaco. If you want to improve your illustration and manga production skills, please have a look at our school’s official site.
I’ve heard of a painting method called grisaille, but I’m not really sure what it is.
I’d like to try it, but I don’t know how… I think there are a lot of people like that.
To paint in grisaille, it’s important to have a good understanding of the unique steps and layer settings of grisaille painting.
In this article, we will introduce everything from the basics of grisaille painting to how to draw an illustration using it. If you read this, you will surely be able to paint using the grisaille technique.
What is grisaille painting?
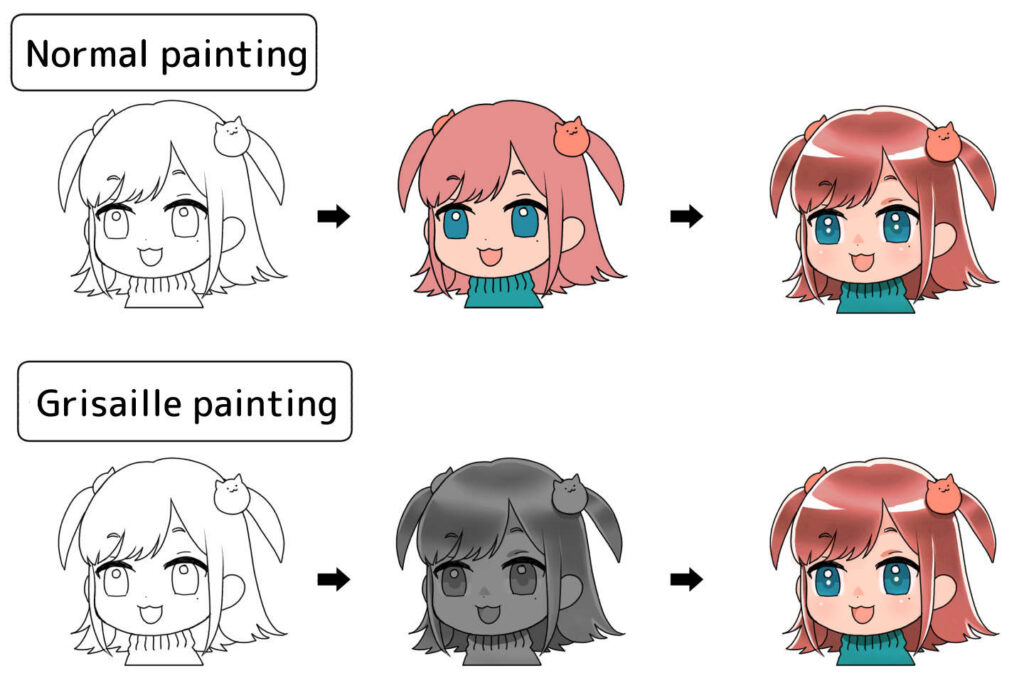
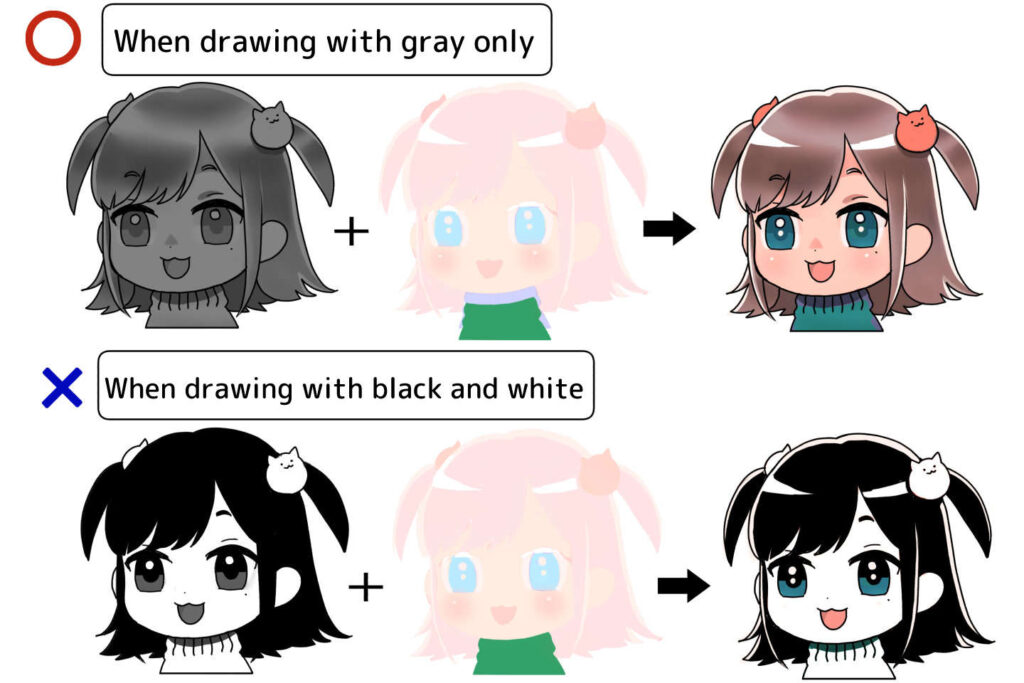
Unlike normal painting where you paint the shadows and hues at the same time, grisaille method is a technique where you first paint the shadows in grayscale (grey), and then overlay the colors afterwards.
It goes well with thick painting, and is characterized by the fact that you can paint thick, heavy-looking paintings, like the kind you often see in social games, in a relatively short time.
Important points taught by the instructor
What is the difference between grisaille method and tick painting?
Grisaille is a method for quickly creating thick, three-dimensional color illustrations. In normal thick painting, you would paint the shadows and hues at the same time, however, in the grisaille method, painting the shadows and adding colors will be performed separately.
Merits and demerits of Grisaille method
Merits:
- Because the shading and hue are painted separately, you can concentrate on the object’s shading without being distracted by the hue
- It becomes easier to draw an illustration with three-dimensionality.
Demerits:
- It is difficult to imagine the finished product, so you need to get used to the work.
- Because it is difficult to draw shading in grayscale unless you can grasp the three-dimensional object, this is for people who can already do some thick painting to a certain extent.
Let’s try drawing with grisaille method!
Now that you know what grisaille painting is, let’s try drawing an illustration using the grisaille technique.
STEP1: Let’s draw illustration with grayscale
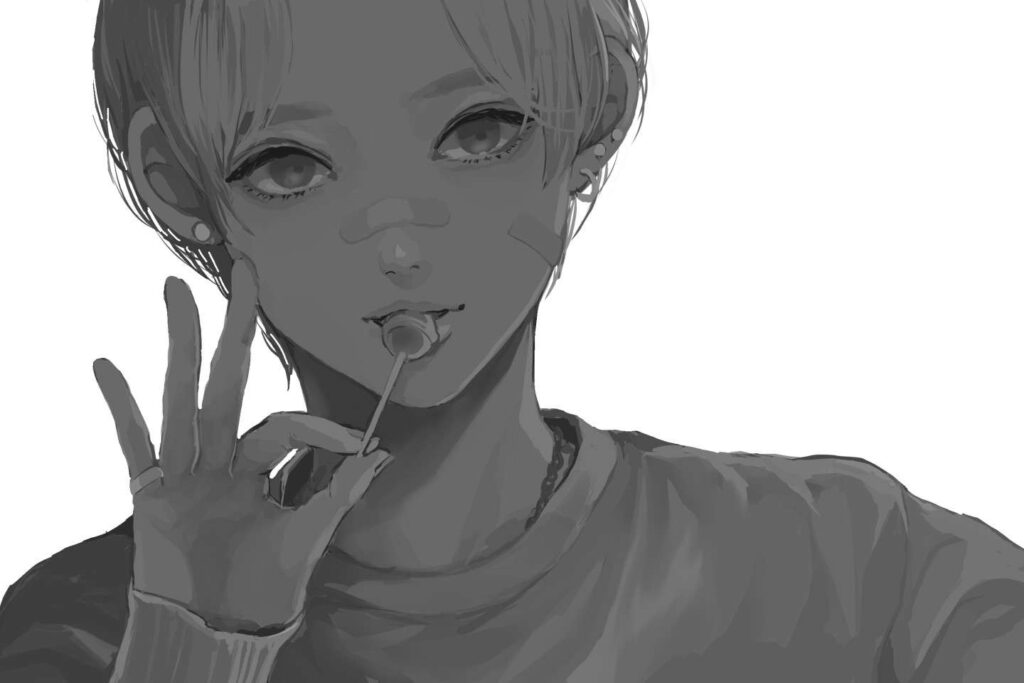
Let’s draw an illustration with grayscale (grey only).
As to the way of painting, tick painting is recommended.
Points to be noted when drawing a gray illustration with grisaille method
When drawing illustrations in grayscale, avoid using pure black or pure white (or colors close to these) as the colors will not show up clearly when overlaying colors if they are too dark or too light.
It is recommended to set the base gray to a density of 40-50%, which is the easiest for colors to show up.
For this reason, you will need to add highlights with lighter hues later on.
When drawing an illustration in grayscale, be careful not to add highlights to things like hair or eyes.
STEP 2: Let’s create a base layer to bring out the color
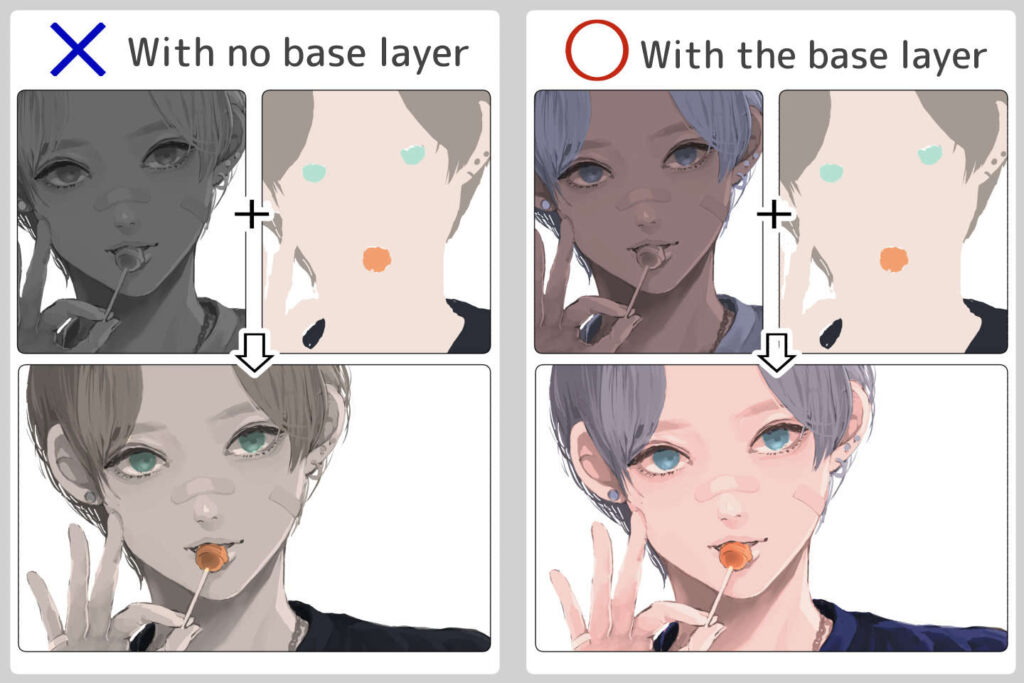
Once you have drawn your grayscale illustration, create a layer to overlay and add colors on the top.
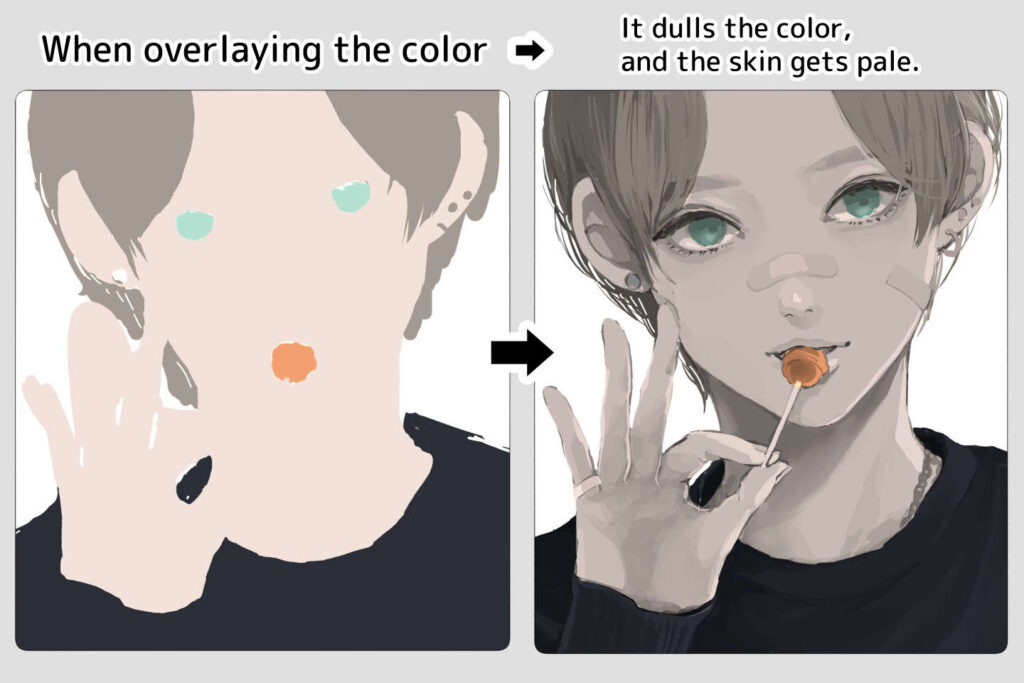
However, if you simply overlay the colors of the parts on top of each other, the color dullness unique to grisaille method will appear.
Therefore, you need to create a base layer to improve the color.
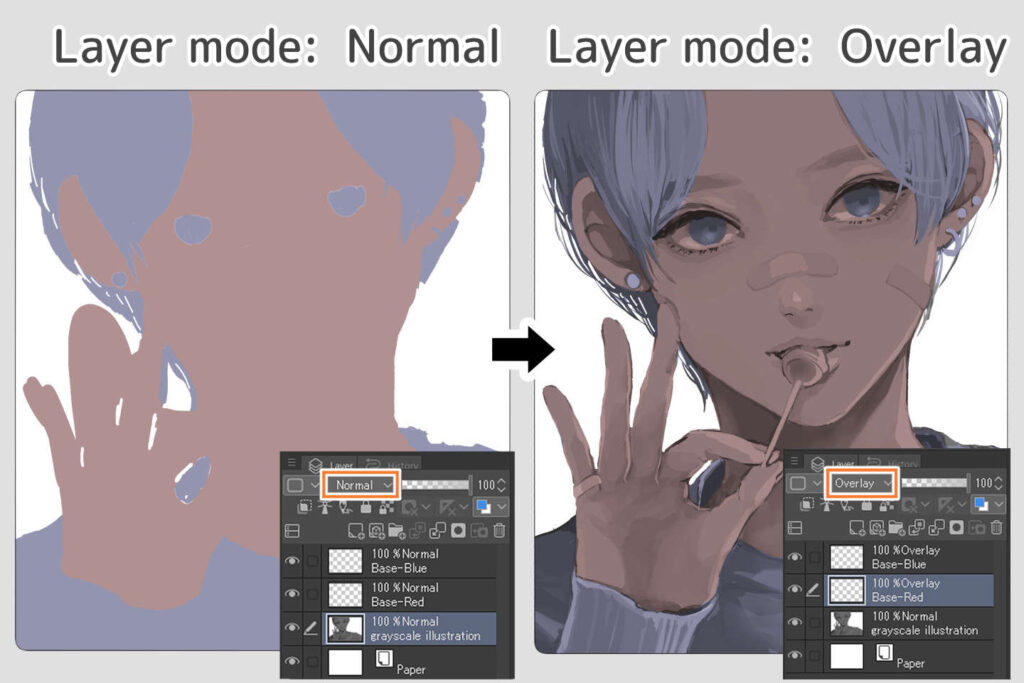
Let’s set up the base layer.
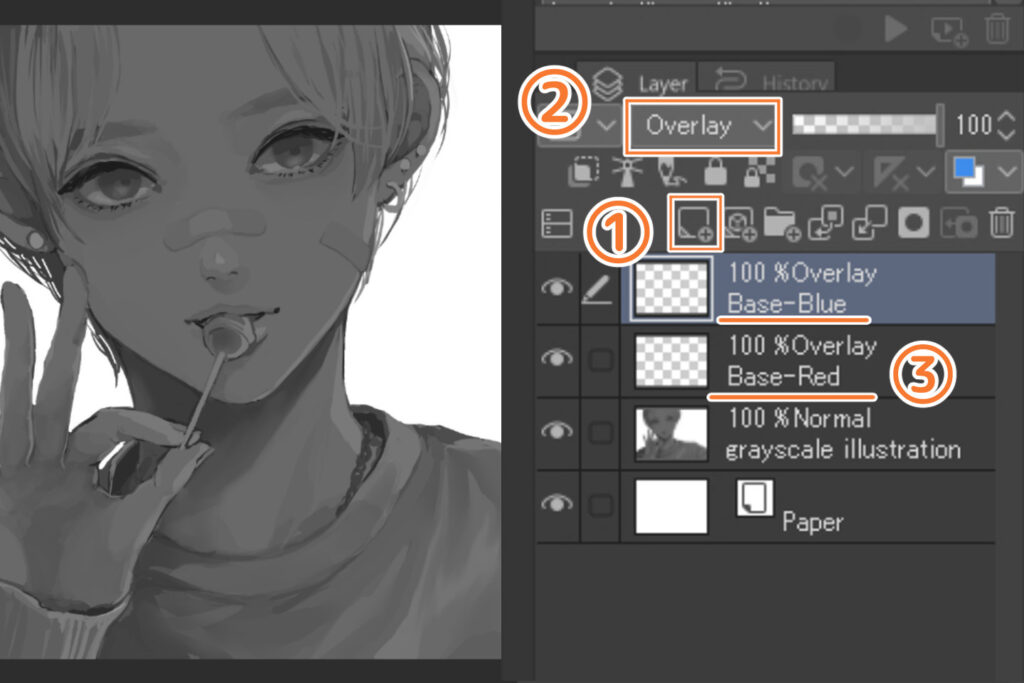
- Create two layers on top of the grayscale illustration you drew in step 1.
- Set the layer mode for both layers to Overlay.
- Change the layer names to something easy to understand, such as Base – Red and Base – Blue.
You have now set up the base layer.
Let’s overlay the red and blue hues
Paint the layers you just created with red for the skin and the warm-colored parts, and blue for the cool-colored parts.
If you use a bright red or blue color at this stage, the color will be washed out when you overlay the part’s color further from the above.
For this reason, it is better to paint with a dull red or blue color as shown in the illustration above, or to paint with a bright red or blue color and then reduce the layer transparency to around 10-20%.
You can paint the red and blue base layers on the same layer, but it is recommended to create them separately, as it is easier to adjust the hues using the color correction function when overlapping the colors of the parts on top.
STEP 3: Let’s paint the colors of each part
Once you have painted the base layer, let’s paint the colors of each part on top.

- Create a new layer for each of the parts (colors) on top of the red and blue base layers you created earlier.
- Set the layer mode to Overlay.
- Rename the layers so that they are easy to understand.
- Paint the colors of the parts on each layer.
By placing the hues of each part on a red and blue base, the dullness of the colors characteristic of grisaille method has disappeared and the vivid colors show up.
STEP 4: Let’s add nuance by painting the colors
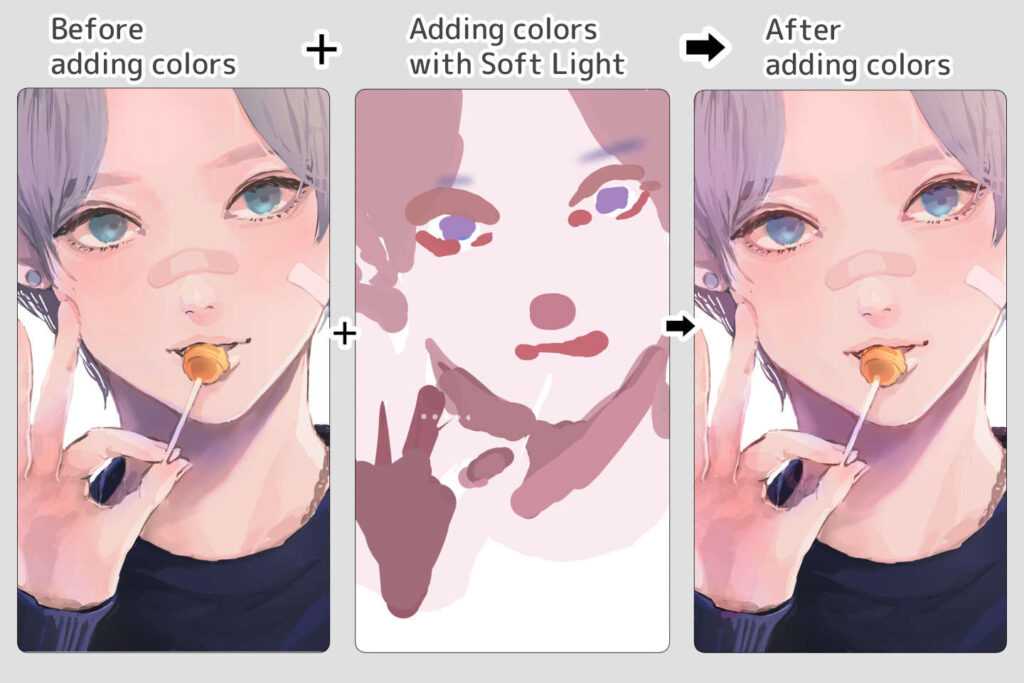
Once the colors of each part have been painted, create a new layer and add even more detailed nuance.
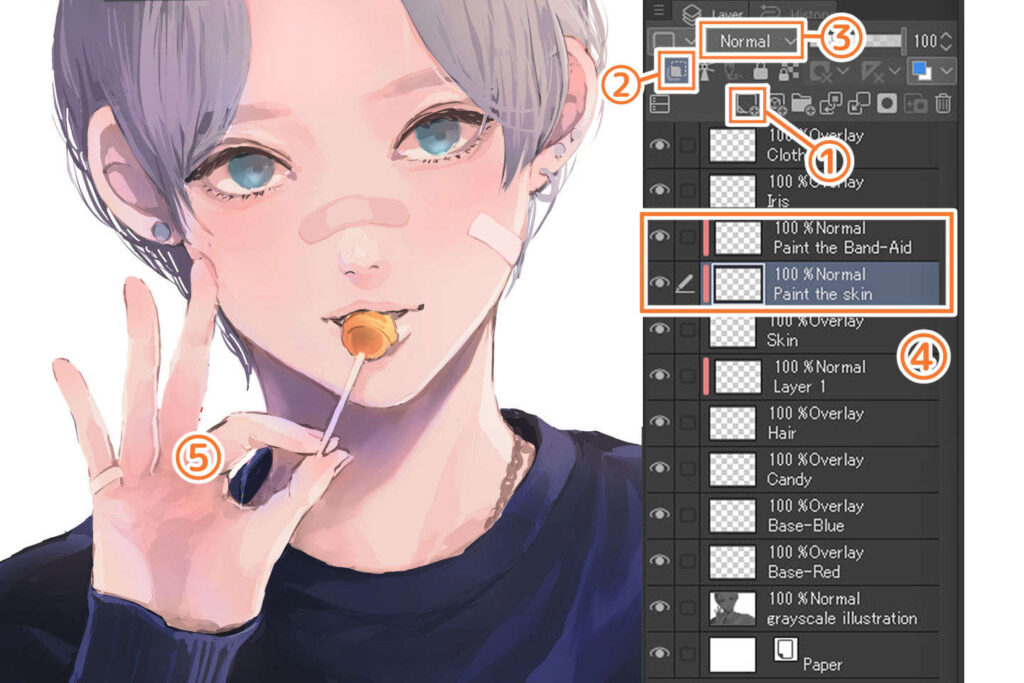
- Create a new layer above the layer you want to add.
- Click on the clipping icon on the layer below. (For more information on clipping masks, click here.)
- Check the layer mode. The default, Normal is fine.
- Rename the layer for clarity.
- Add the finer nuances.
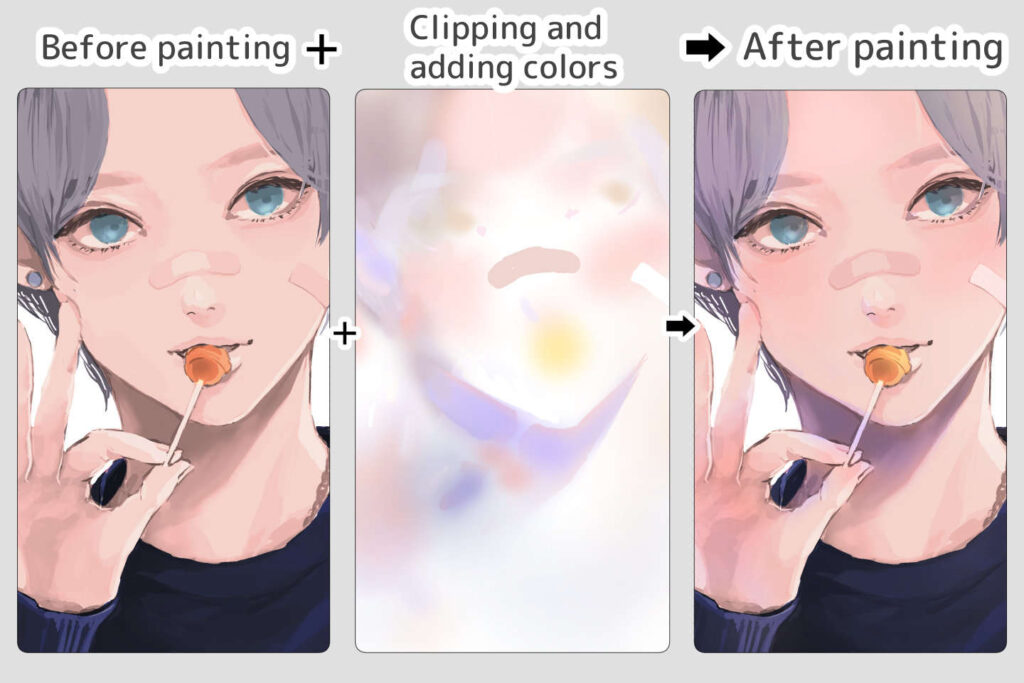
As shown in the image above, this process will make the illustration’s colors even more complex.
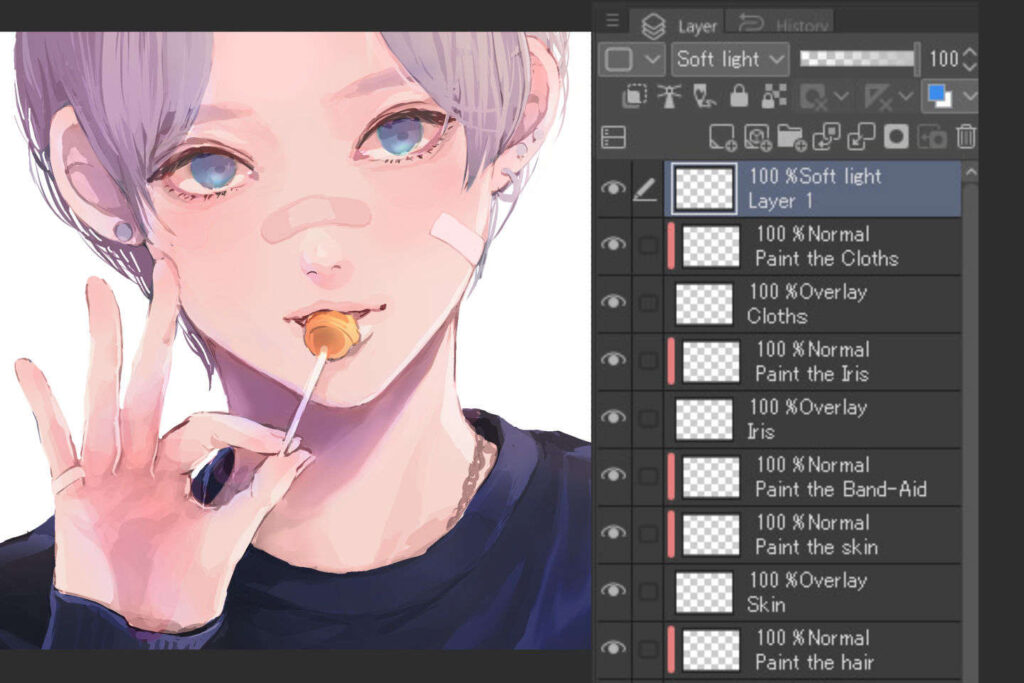
If you want to make the hues even more vivid, it is recommended that you add a layer in Soft Light mode on top.
STEP 5: Let’s add highlights and finish up with a normal layer
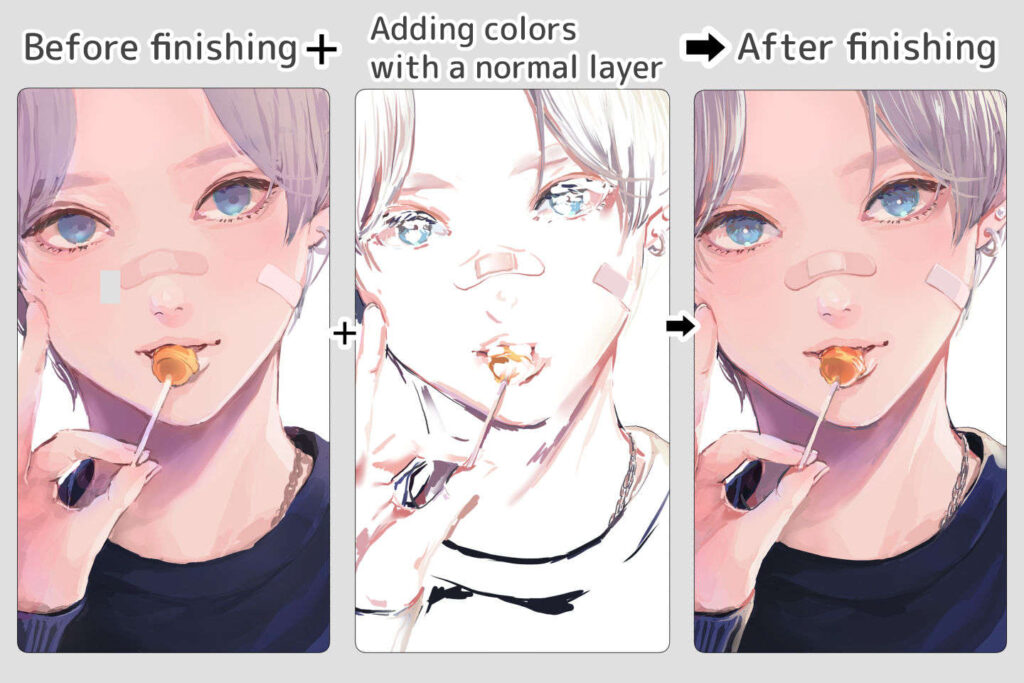
Finally, to finish the illustration, create a normal layer at the top of the layers and depict highlights and fine details to tidy up the whole thing.
By carefully carrying out the finishing work, you can greatly improve the quality of your illustration.
The illustration is complete by the grisaille method!
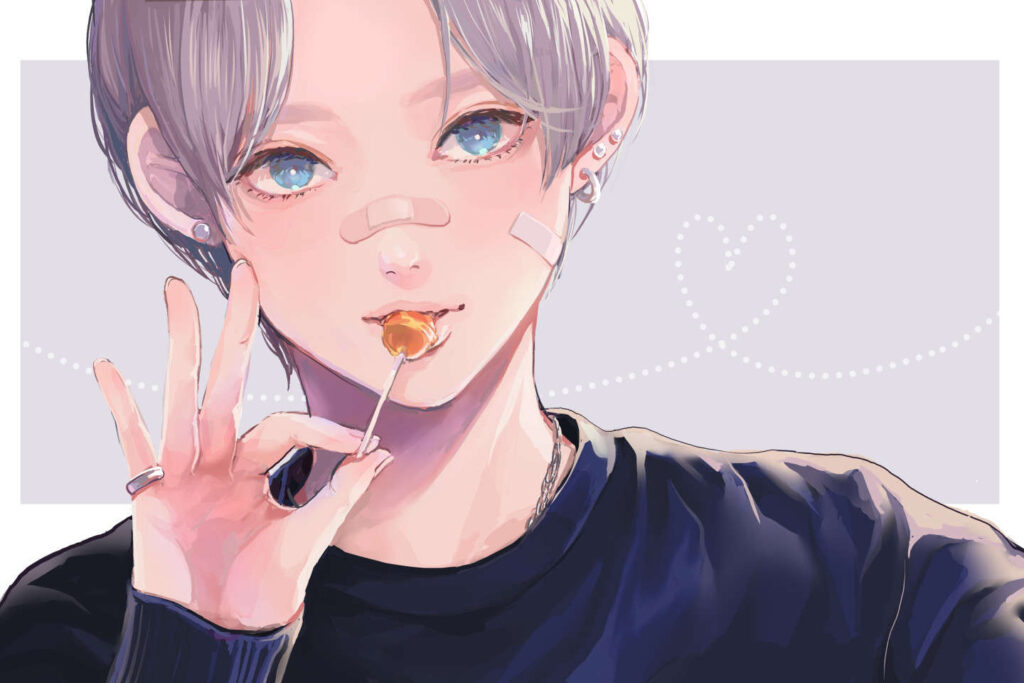
Add the background and you’ve finished your illustration!
Advanced: Let’s learn about different arrangements of grisaille method
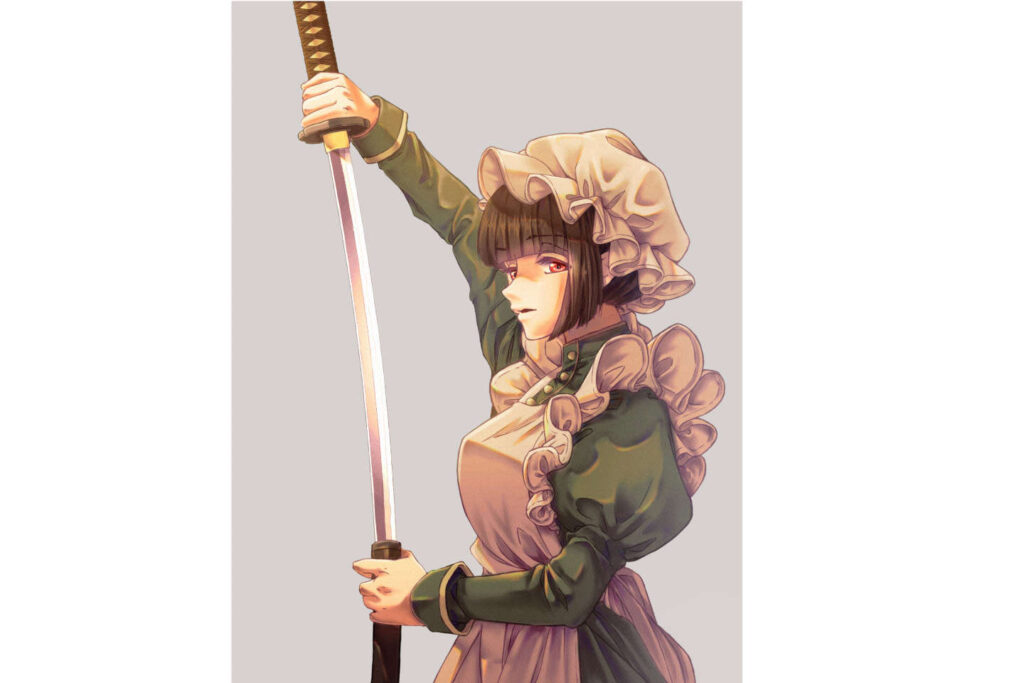
The illustration above was also drawn by the grisaille method, but the procedure for applying the colors is slightly different.
There are various arrangements in grisaille method.
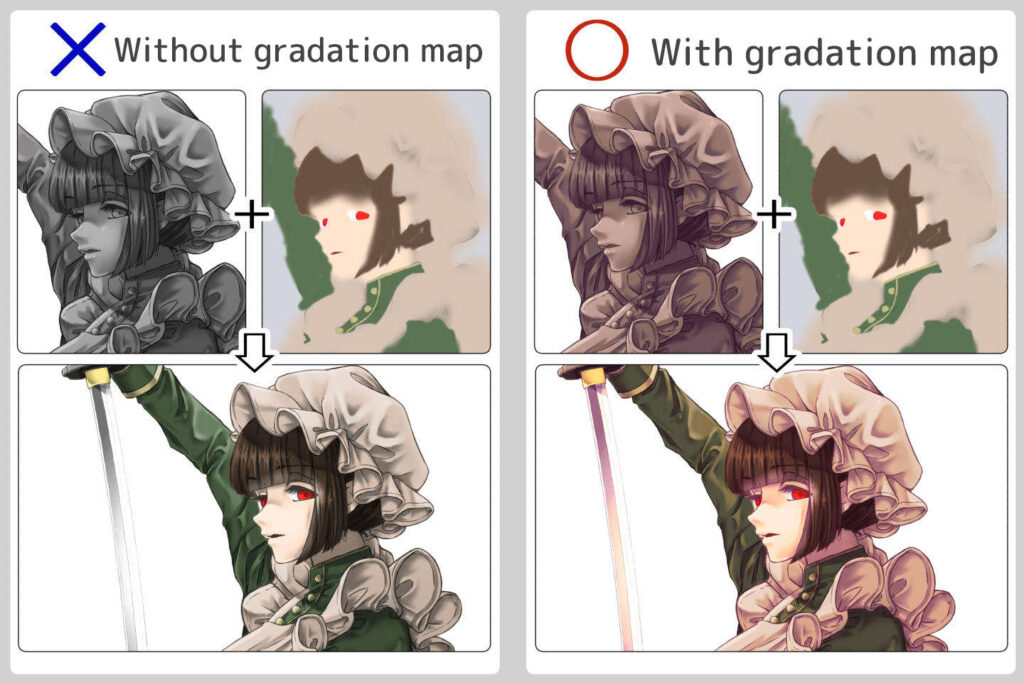
In the procedure introduced at the beginning, we used an overlay to create a red and blue base in order to remove the dullness of color that is characteristic of the grisaille method; however, as you can see the above illustration, By using a gradation map onto the illustration which was drawn with grayscale, it becomes possible to use it instead of formerly introduced procedures.
There’s also a way of grisaille method to add colors to an illustration with gradation map only .
Once you’ve got used to painting with the grisaille method, why not try out various different arrangements?
Conclusion
By reading this article, you should now know how to paint using the grisaille method.
We really hope that you will challenge the grisaille method based on this article.
However, due to the unique procedure in the grisaille method, you may not be able to overlay the colors as you want or you may not be able to paint as you want, at first.
Pickup Articles
Category Related Articles