This article was created by the illustrators and manga artists who teach at the illustration and manga school, egaco, based on the knowledge and skills they have honed through commercial production and other work. If you would like to learn more about content that is tailored to what you want to draw, we recommend taking a private lesson at egaco.
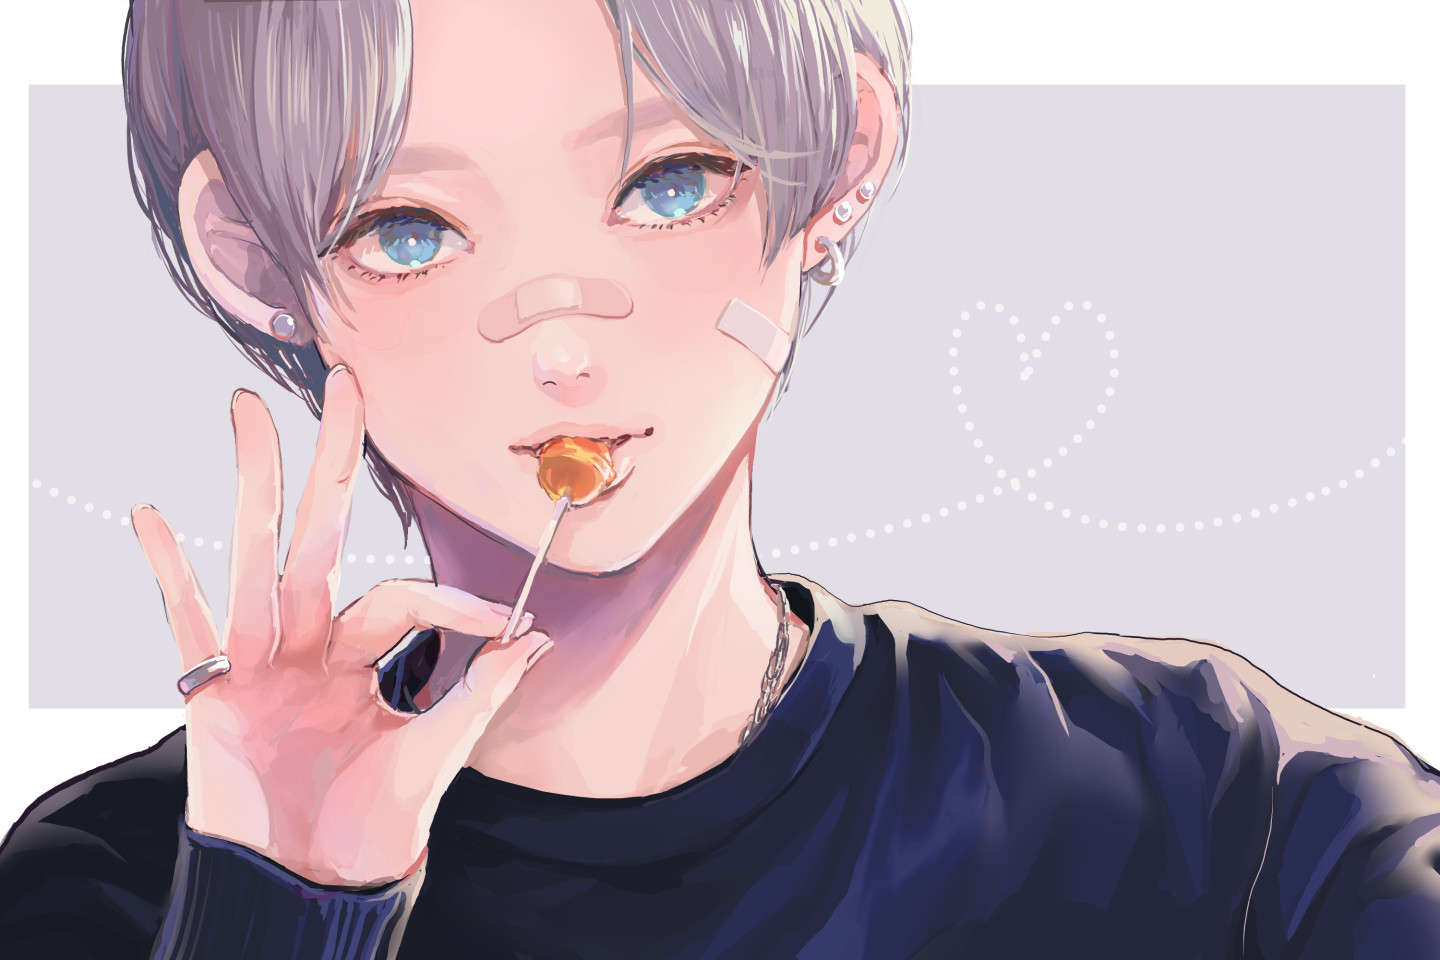
Have you ever wondered how to draw ears?
● Because they are attached directly next to the face, it is difficult to draw them while looking directly at them or using a mirror.
- Even if you want to refer to your favorite manga or anime, the way they are drawn differs from work to work, so you don’t know which is the correct way and you want a model.
● I want to know how to draw simple ears.
The most important thing when drawing ears is to understand the basic shape of the ear.
Here we will explain the structure of the ear and the basics of how to draw it. Let’s understand the structure and draw your own attractive ears.
An easy-to-understand guide to learn ear’s structure and the basics to draw ears!
Let’s understand the structure of the ear before everything
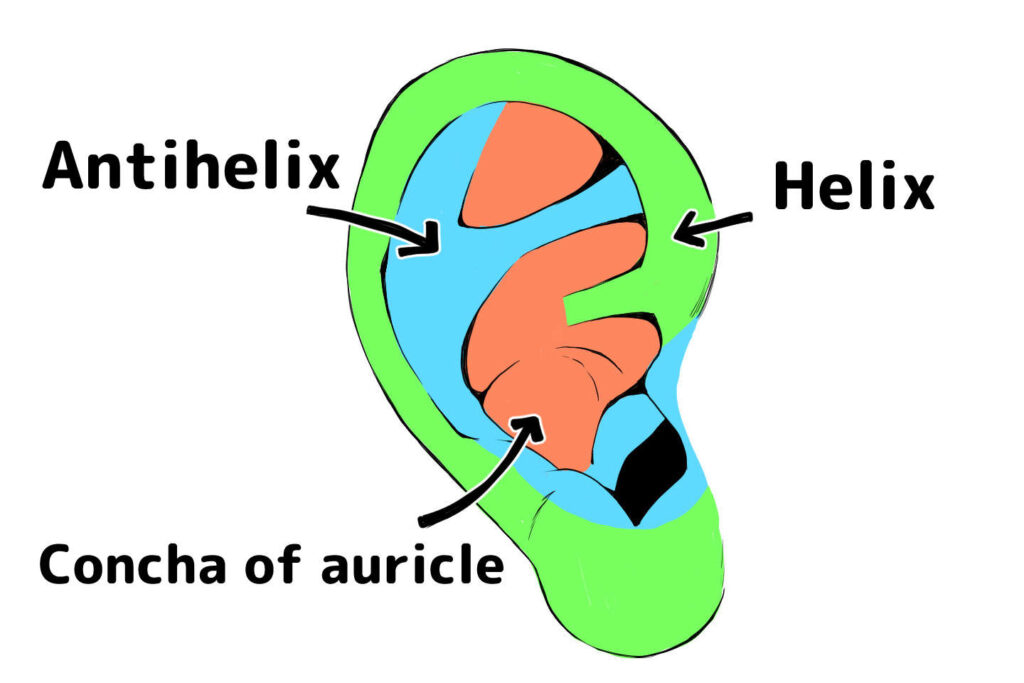
The three parts that make up the ear are the Helix, Antihelix and Concha of auricle.
There are also various other parts and names for the ear, however, we will explain the three basic parts in this article.
If you are aware of these three parts well, you can easily draw ears.
Helix
The helix is the edge of the ear.
It is shaped like the letter C, and the earlobe is also included in the helix.
In addition, the size of the earlobe varies from person to person.
Antihelix
The antihelix is located at the inside of the helix.
It is characterized by its bent, distorted Y-shape.
It is connected to a protrusion of the ear called tragus, and is designed to cover the earhole.
As the antihelix gradually moves downwards, it becomes a small bump called the antitragus.
Concha of auricle
This is the part of the ear that corresponds to the earhole.
When drawing the ear, this is the part that is shaded.
If you are too conscious of the parts and draw them too much, the atmosphere of the picture may not match the style you are going for.
While being conscious of the three parts, reduce or increase the number of lines to suit your own drawing style.
Let’s understand the position of ears!
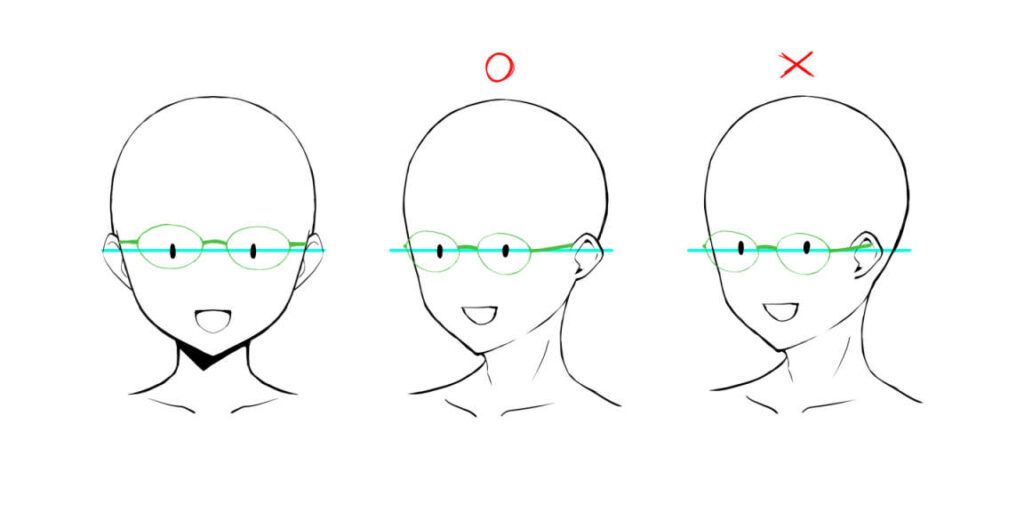
The ears are at the position of the arms of the glasses.
*The rightmost example is not good because the position of the chin and the position of the ears are misaligned.
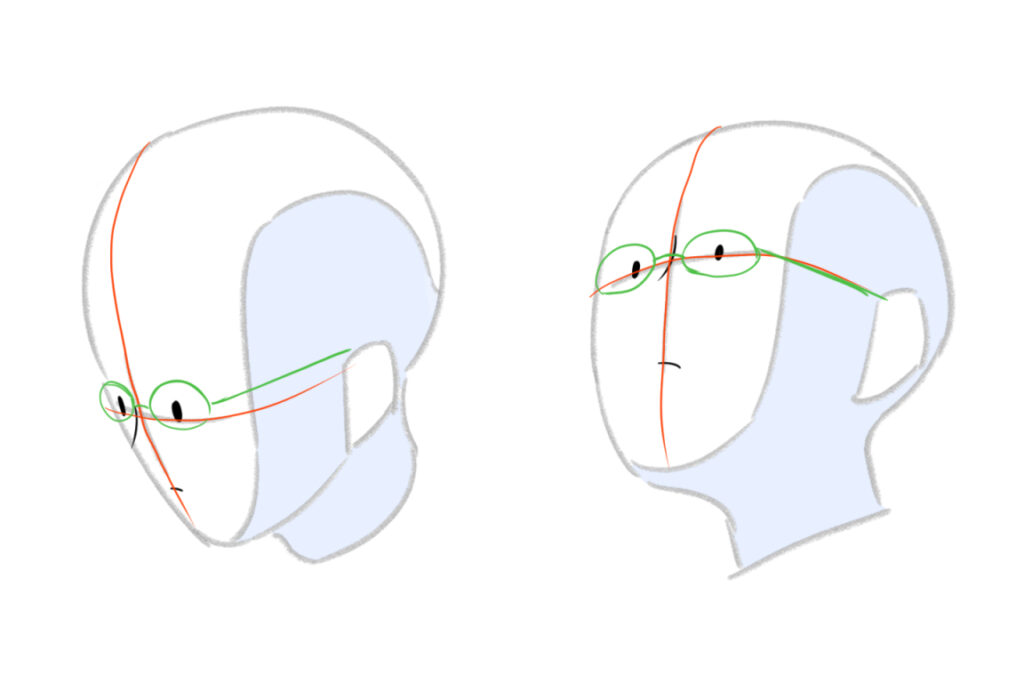
Use the crossline on the face as an auxiliary line when drawing.
*The direction of the crossline will change depending on the direction of the face.
The ears are at the same height as the eyes.
Try drawing the glasses, and be aware that the ears are at the position of the arms of the glasses.
When drawing the ears, it is easy to understand the height so that the upper edge of the ear is about the same height as the eyebrows, and the lower edge is about the end of the nose.
However, if you are drawing a character with large eyes such as in a girl’s manga, you may find it difficult to position the ears correctly, and they may end up being too large or too small, so be careful.
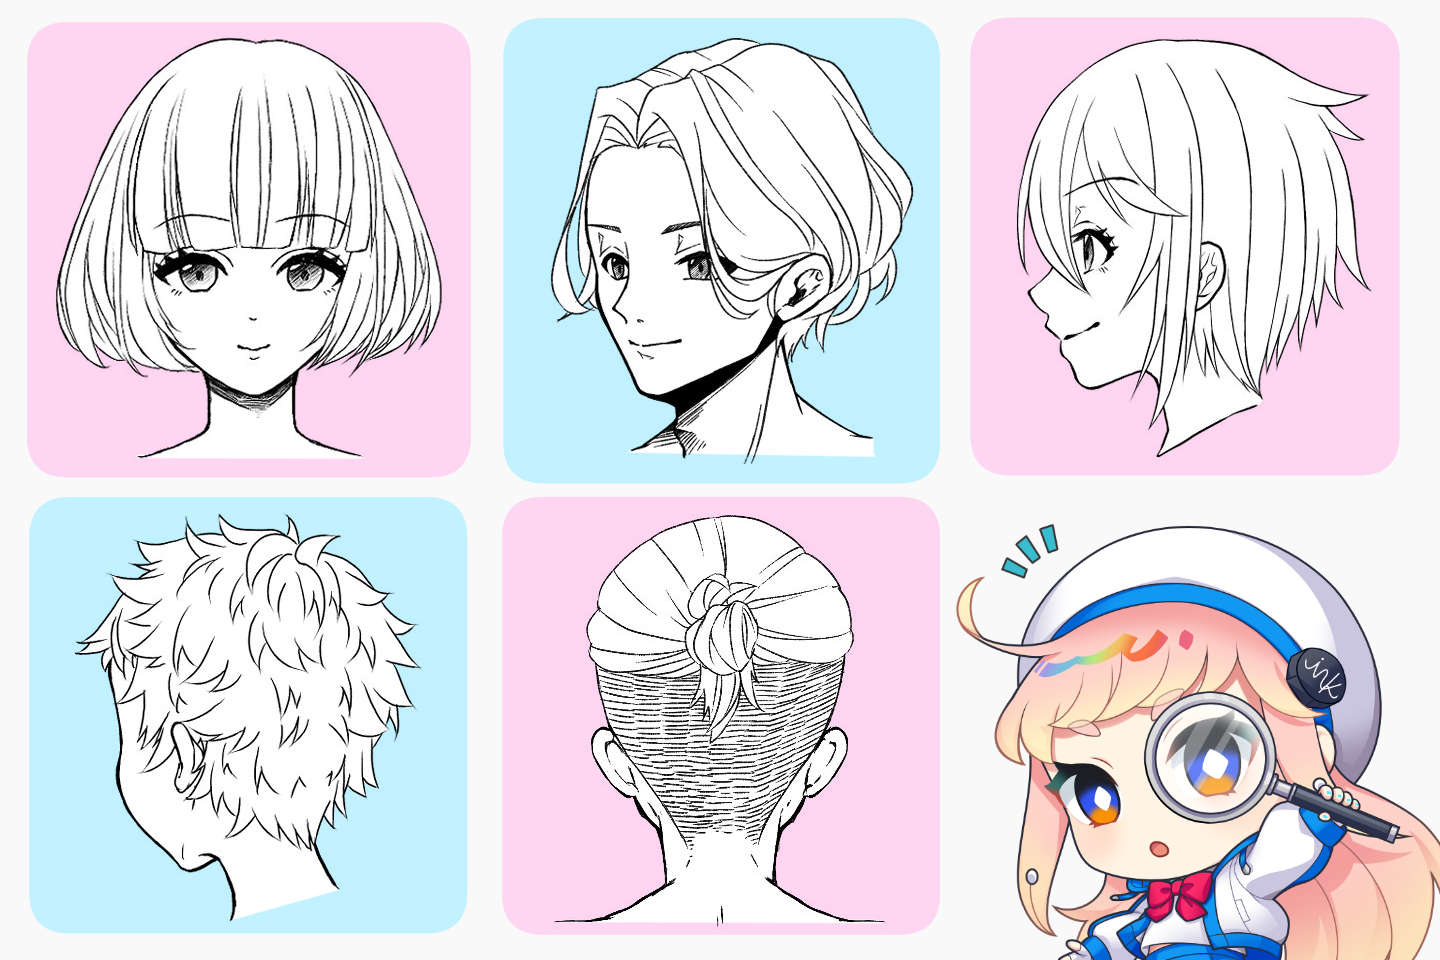
Let’s understand how the ears look different depending on the angle
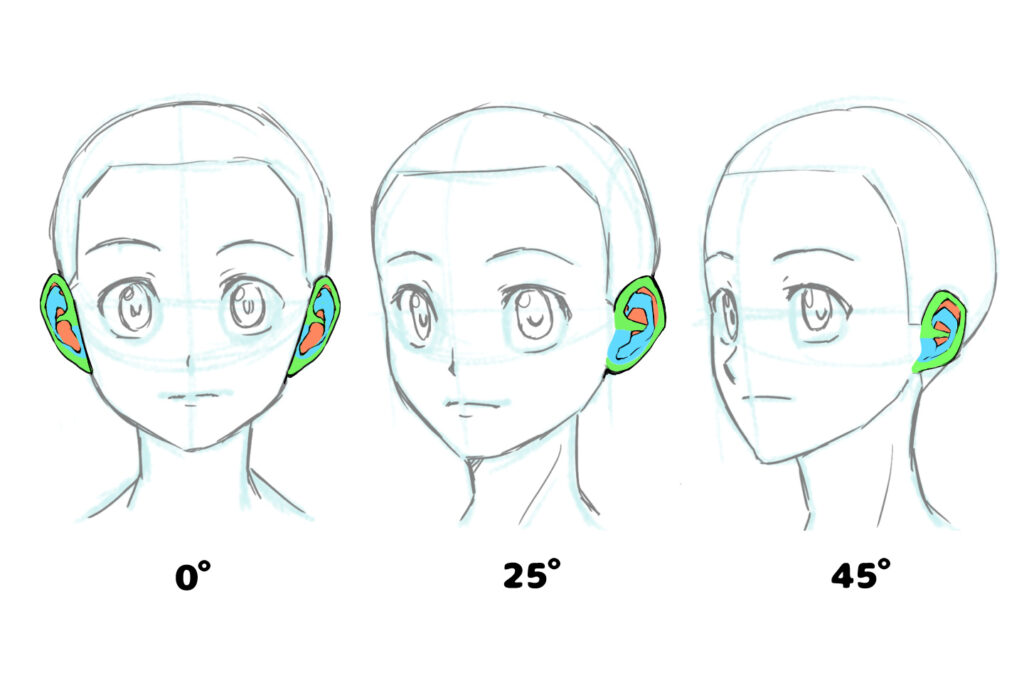
When looking from a different angle, the way that the ears look different, too.
When looked from the front as in the illustration on the left, the ear holes are not very visible, and it looks as if the tragus is covering them.
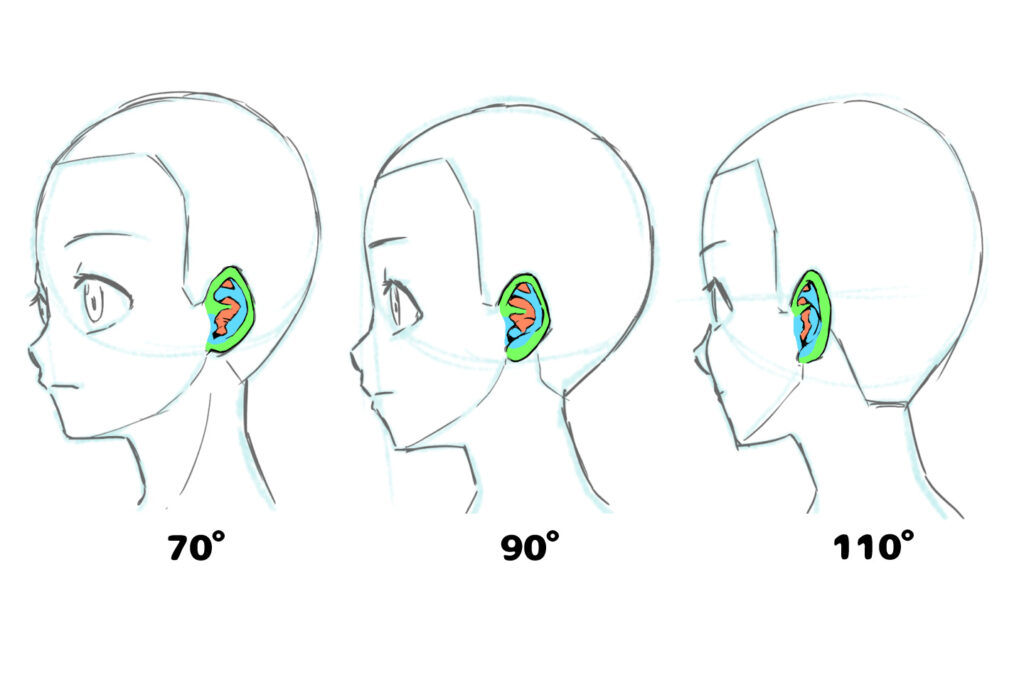
If you look at it from the side, you can see the ear holes clearly.
In the case of a profile looked from the side, the ears are positioned right in the middle of the head.
The tragus and earlobe are thick and round, and the rest of the ear is made up of cartilage.

The base of the ear is hidden behind the cheekbone, and if you look at the ear from directly behind, you can see the trapezoidal base.
Three-step guide to drawing the ear
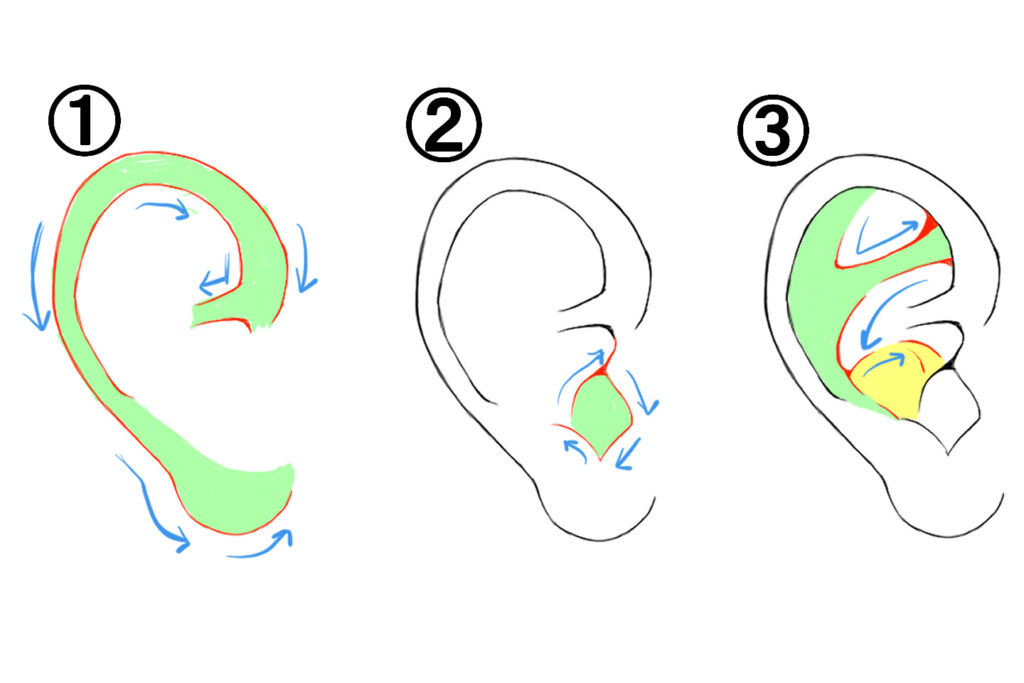
We suppose many people find it difficult to draw the ears, so we will explain how to draw them in order.
- Start by drawing the outline of the ear, the helix.
At this point, draw the top part, the part that touches the helix with a double line.
It is also easier to understand if you imagine it as a hook-like shape. - Draw a diamond shape on the earlobe. This will be the part of the ear hole and the lid of the ear hole. Draw a Japanese katakana, ko (a letter looks like a hook) on top of the diamond shape to make the concha of auricle..
- The green part of the antihelix is curved, and its distinctive feature is that it looks like a distorted Y-shape. Draw it so that the Y-shape spreads out from the top of the earlobe to the inside of the helix.
How to draw ears to give the character more individuality?
The size and shape of ears differ from person to person.
Even in manga and anime, there are differences in how characters’ ears are drawn giving them their own unique characteristics.
For characters you want to give a special feel, it’s also recommended to change the shape of their ears consciously or add earrings or other accessories.
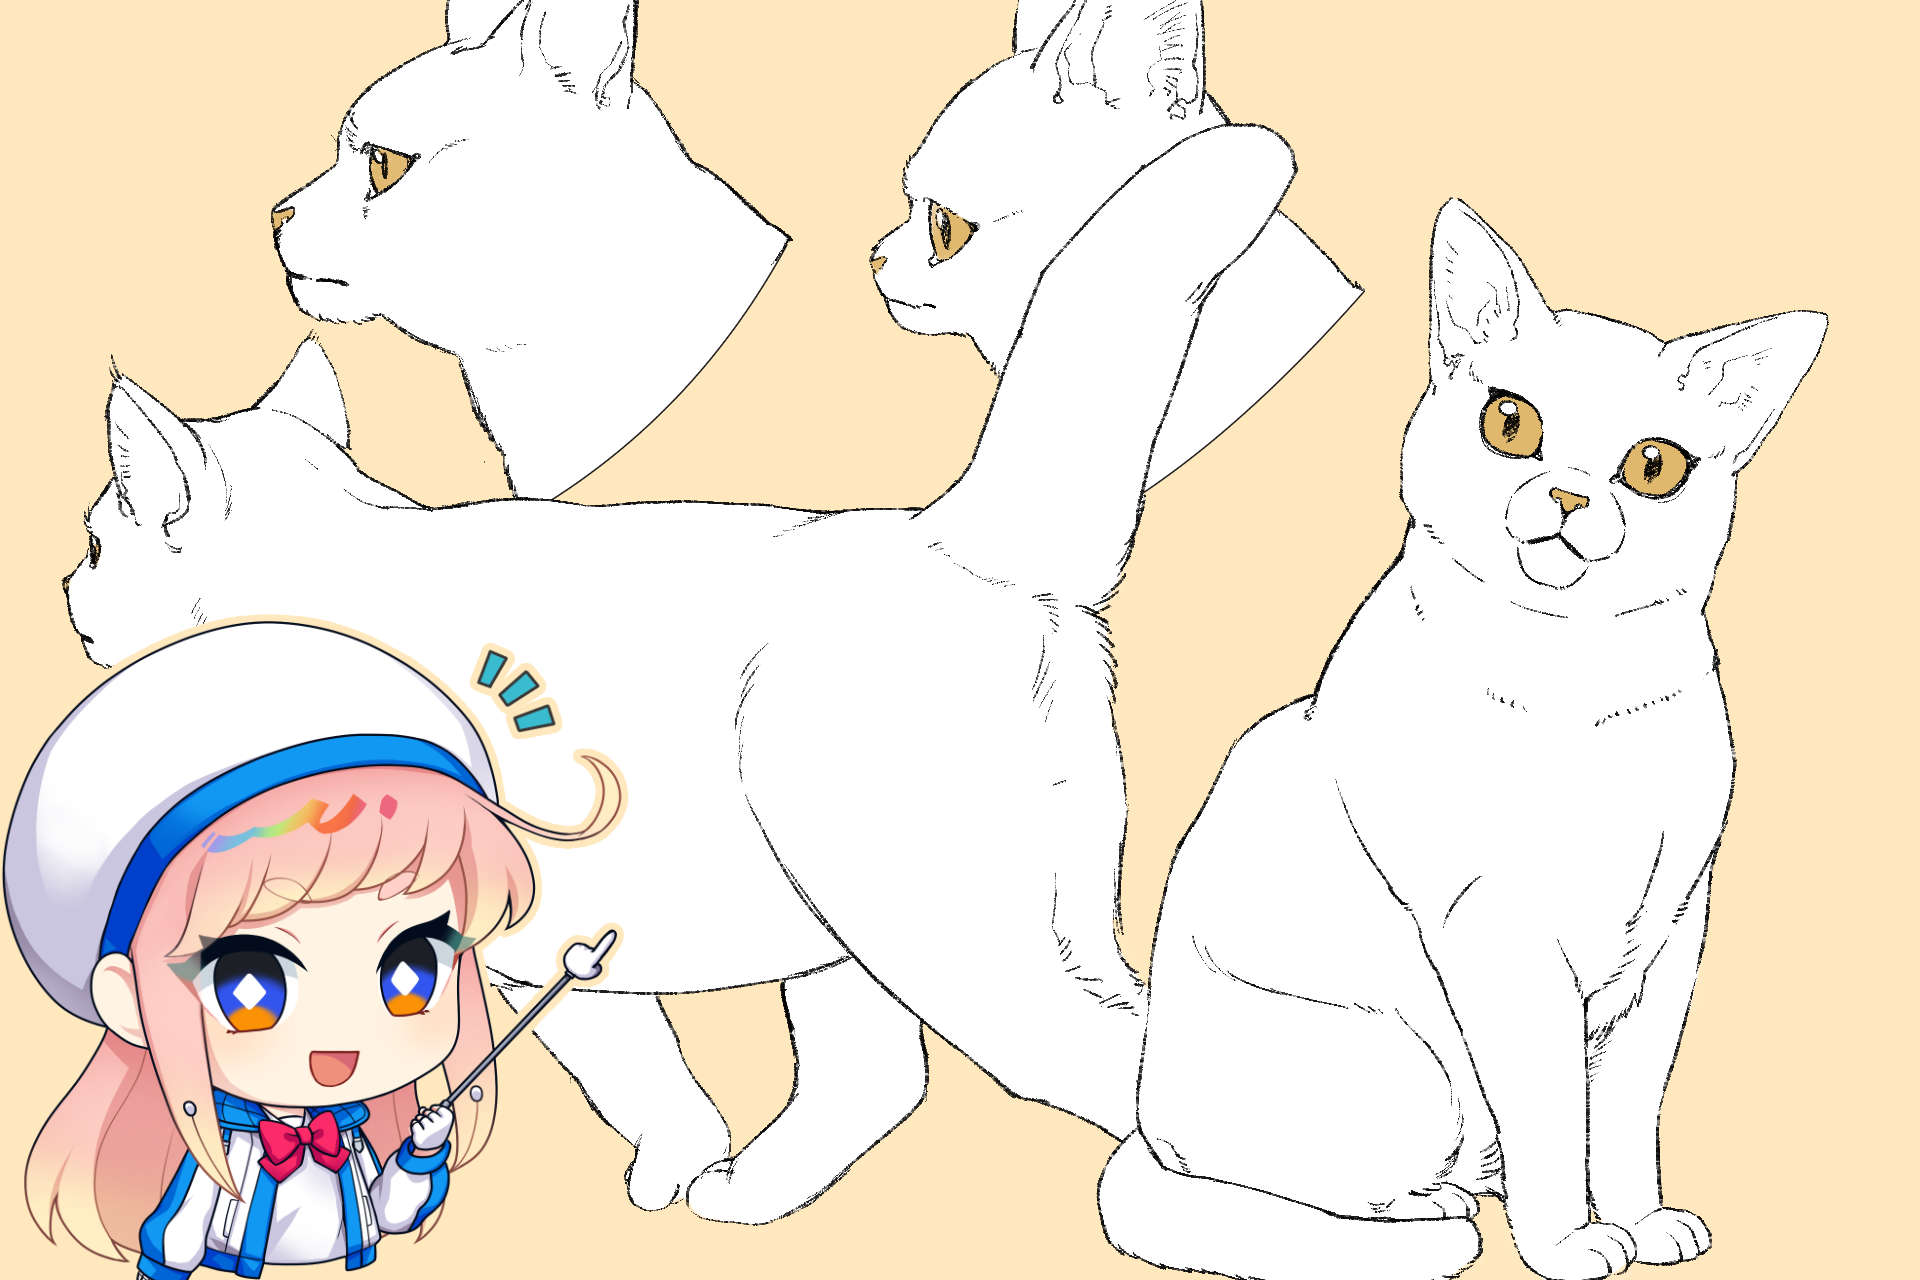
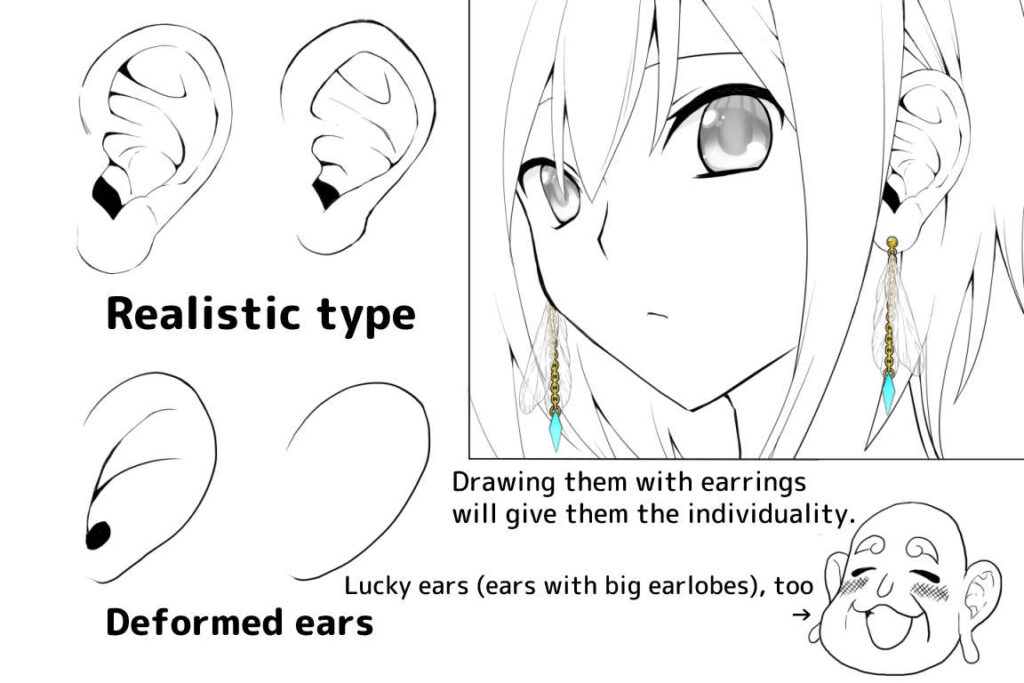
Let’s remember various types of ears and apply them to your works
Even though we call them ears, they come in all shapes and sizes.
You can draw ears realistically or deform them, or you may draw them referring to your favorite manga or anime in which you found the shape of ears of your taste n a proactive way.
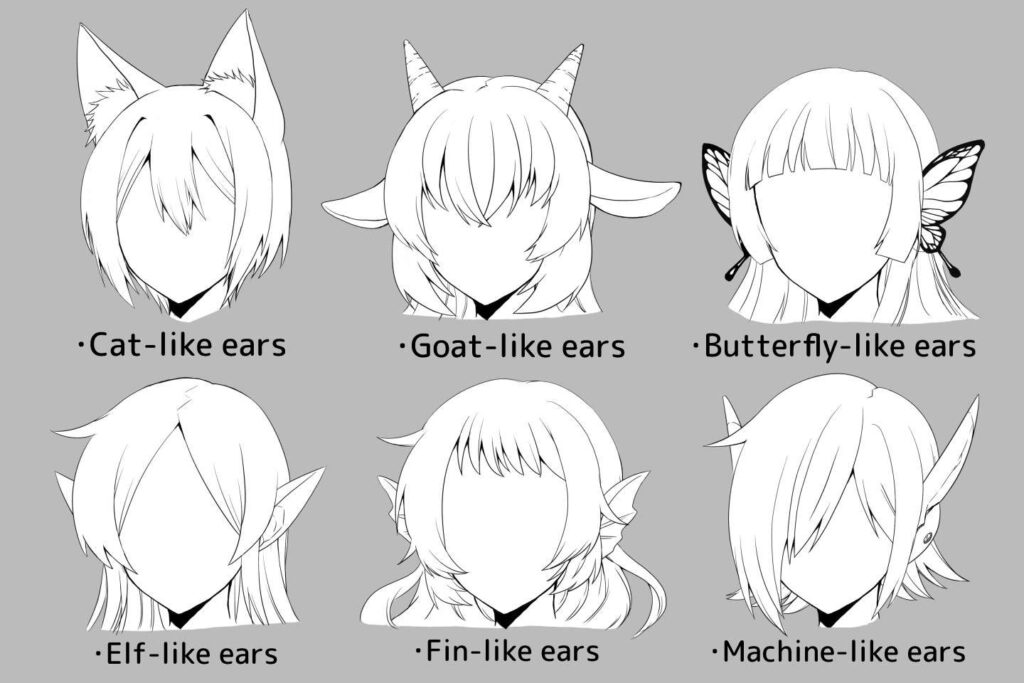
There are also many other ways to draw ears that include fantasy elements, such as cat ears or elf ears.
If you want to draw cat ears or other kinds of animal ears, we recommend you to refer to the illustrations of manga artists and illustrators who draw animal ears of your taste as well as games.
Teachers drawing wonderful animal ears’ illustrations and their works
● Shugao-sensei (Animal ears’ Character Design Book (Cho-egakeru Series)
● Saru-sensei (Azul Lane “Akashi”, etc.)
● Kemono (animal) Friends series
● Grand Bleu Fantasy
When drawing fantasy ears such as elf ears that don’t really exist in real life, you should also prepare reference materials well.
It’s very difficult to draw without looking at anything.
Just like animal ears, you should refer to manga artists, illustrators, and games.
Artists drawing wonderful elf-like and machine-like ears and their works
● Elf ears: Ryoko Kui (Dungeon meshi)
● Machine-like ears: Phantasy Star Online (Cast), ToHeart series, etc.
The names of the works and services listed here are generally trademarks or registered trademarks of respective companies.
Ears show a person’s individuality
The explanation given here only covers the basics of how to draw ears.
If you want to know more or master how to draw ears, please come and try egaco’s free trial. At egaco, our instructors explain in detail how to draw attractive ears in our private lessons.
Pickup Articles
Category Related Articles