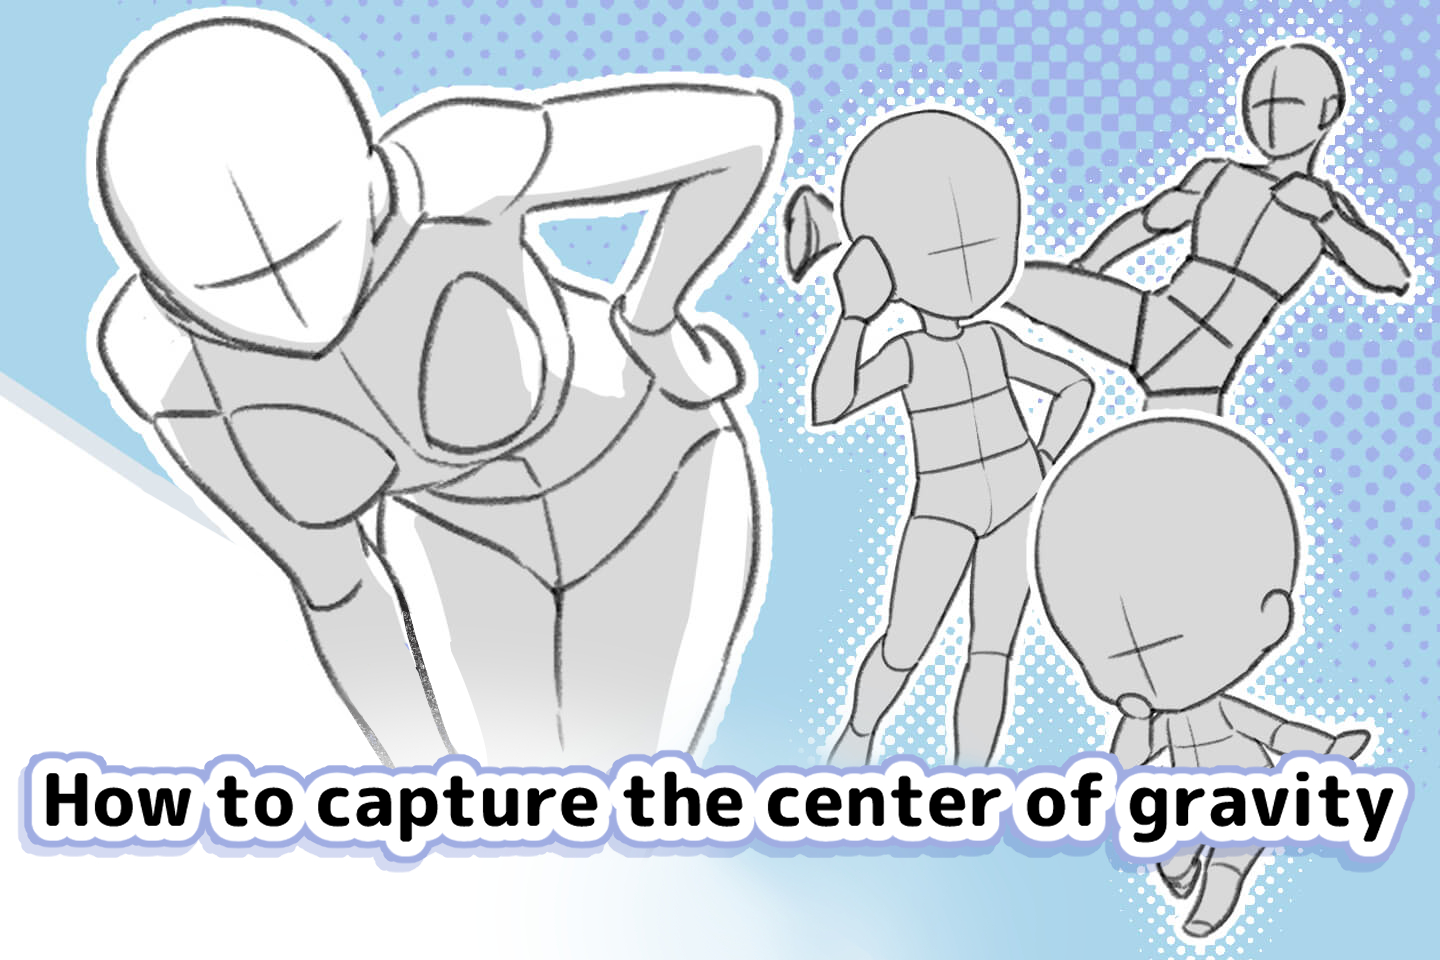
When you’re drawing a character with a pose, sometimes the body looks well-balanced but the pose looks unnatural or a bit stiff.
Unnatural or stiff poses are caused by incorrect or unclear center of gravity.
Let’s learn the basics of the center of gravity to draw more natural poses.
If you know the basics and tricks of the center of gravity, you can draw natural poses!
What is the center of gravity anyway?
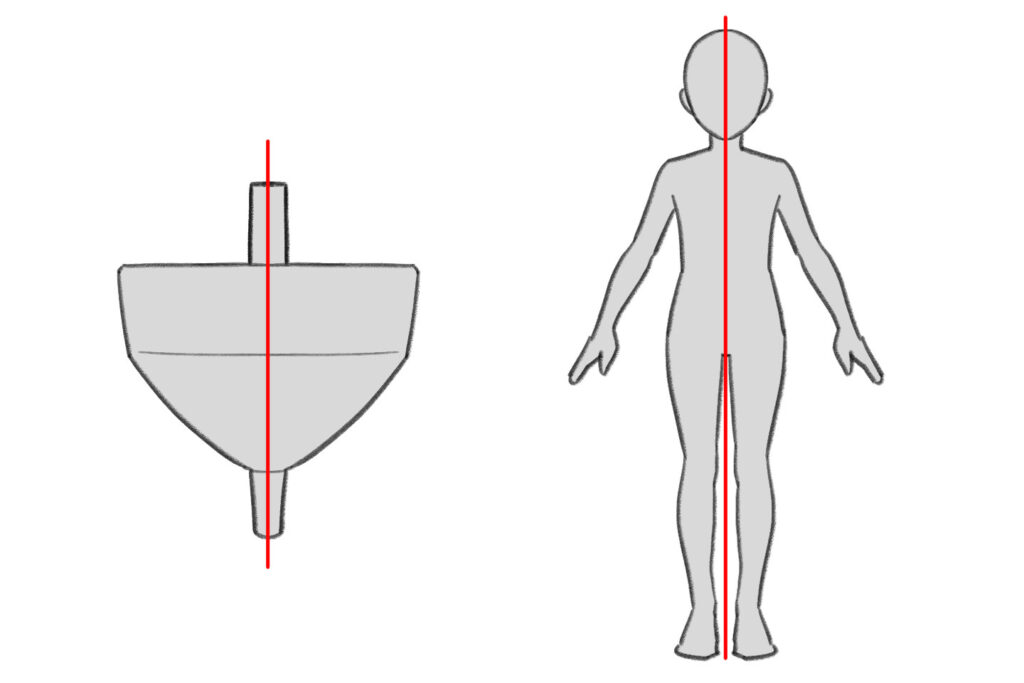
The center of gravity refers to the center of axis that supports the overall weight, like a toy top.
The human body has weight, and the center of gravity as well as the axis change depending on the pose and the proportion of the head vs whole body.
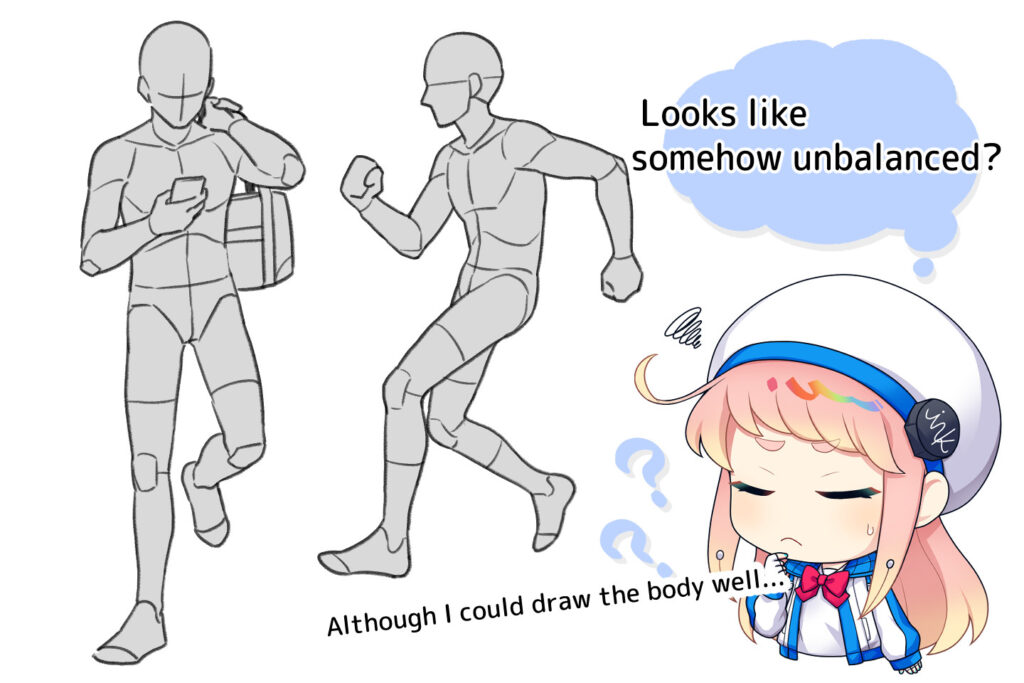
As you can see in the image, the reason why it looks loosing its balance is because the center of gravity and the axis have slipped off.
If you learn how to find the center of gravity, you can improve your skills
The position of the center of gravity changes slightly depending on the proportion of the head size v.s. the whole body. Let’s remember the approximate position of the center of gravity according to the proportion of the head size v.s. the whole body.
Six toshin or more: (one toshin = the size ranging from top of the head to the chin) think of the center of gravity as being at the center of the stomach
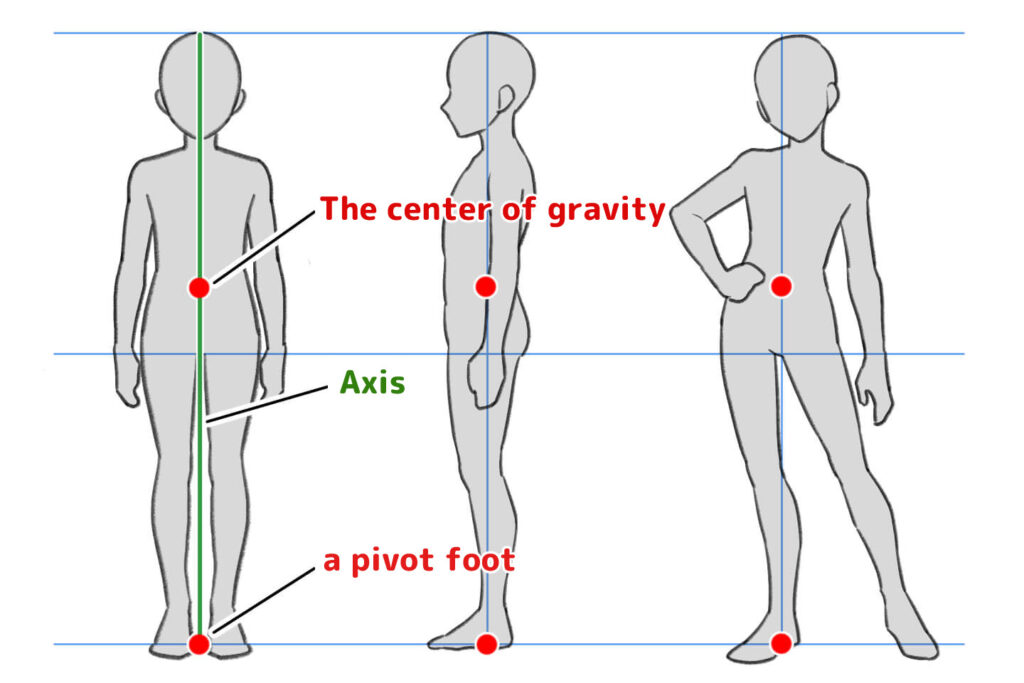
If the figure is an adult with a height of six toshin or more, or if it is close to the height of a realistic person, the center of gravity is at the navel, and the position is around the center of the stomach.
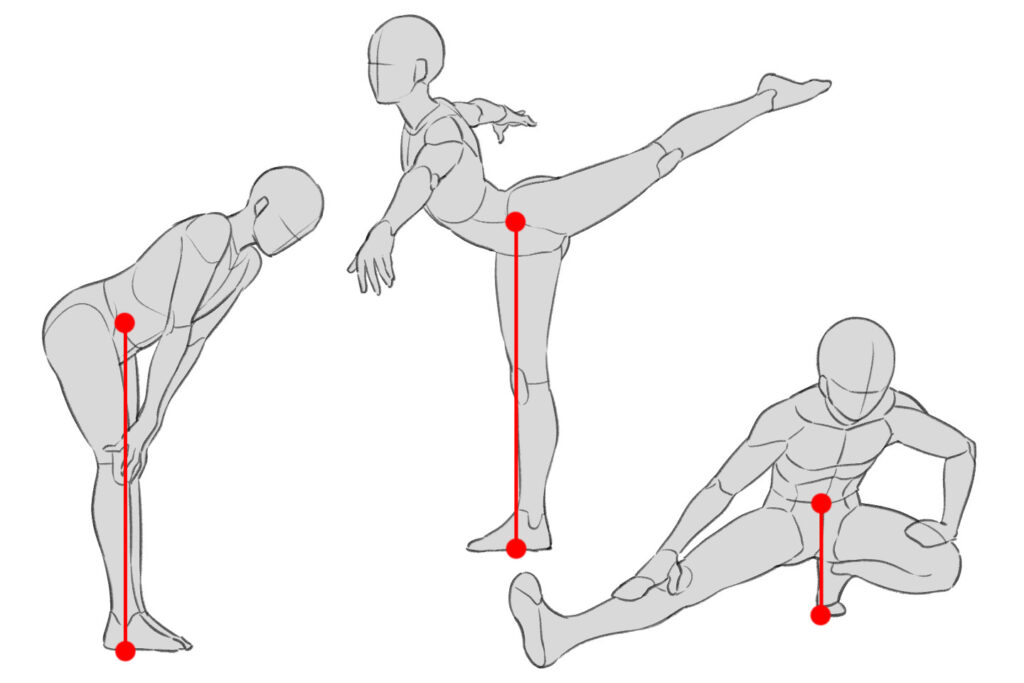
If you draw a line straight down from there, and if the pivot foot on which the weight was placed comes at the position of that line, you can draw a pose with a stable center of gravity.
Also, the line connecting the center of gravity and the pivot foot will be the axis to keep its balance.
Less than six toshin: (one toshin = the size ranging from top of the head to the chin) the position of the center of gravity is like a child whose toshin is lower
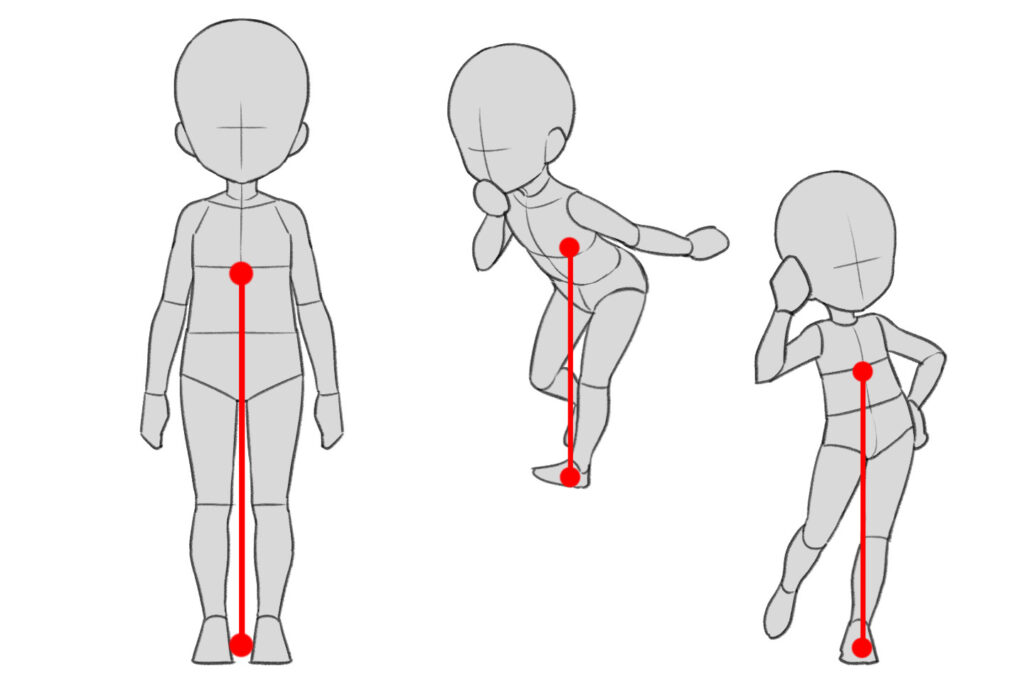
In the case of the body with less than six toshin, the head is also large, so the center of gravity is slightly higher than the one in an adult-like body.
In the figure above, the center of gravity of a four-toshin body is taken at the pit of the stomach, below the chest.
SD character: Position of the center of gravity is at the joint of the head
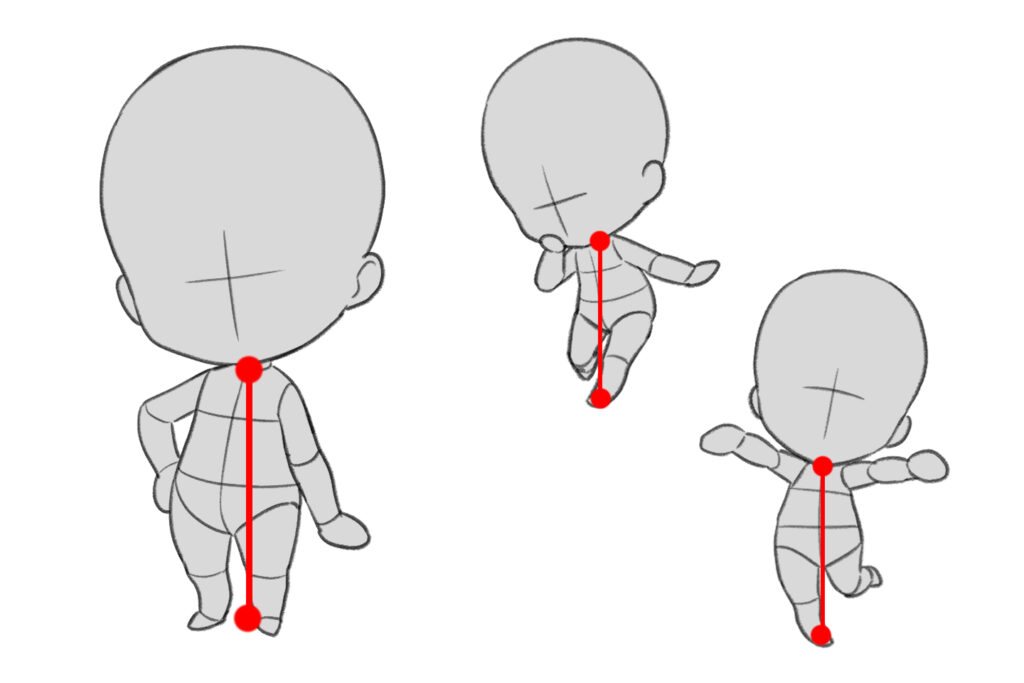
In the case of SD (super-deformed) characters having two to three toshin, the head is large,
and the body is drawn quite small in comparison with it, so the center of gravity is closer to the head which is the heaviest part.
It is a good idea to put the center of gravity on around the position of the neck.
What is the secret to balancing complex, and dynamic poses?
For complex poses, think about the center of gravity according to the proportion of the left and right sides.

For complex poses or poses with a lot of movement, it becomes more difficult to draw the body in a way that makes it look balanced.
In such cases, it is a good idea to draw a vertical line from the center of gravity and divide the body in two, the left and right. And then, confirm whether the specific gravity of the area is not skewed to one side.
If you weigh these parts as if using scales, and the weight and the area become roughly equal, you will get a well-balanced pose which captured the center of gravity.
For the center of gravity of a pose in motion, be aware of its speed and weight!
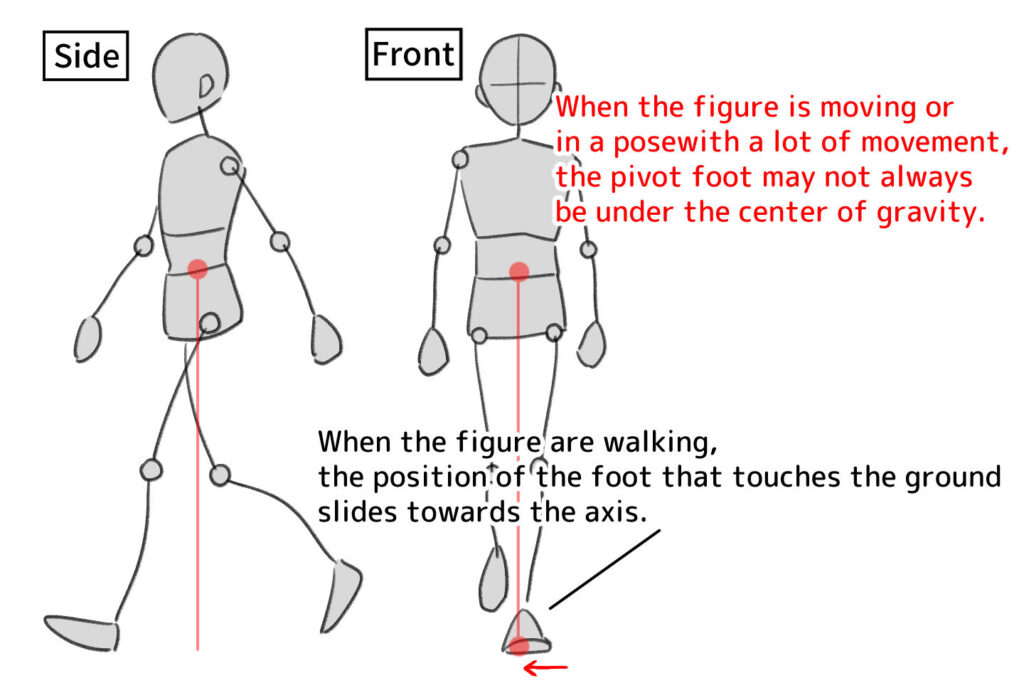
When the figure is moving, its weight is shifting, so it does not necessarily mean that the pivot foot will be under the center of gravity.
However, in order to create a natural movement in a pose, it is important to be aware of the relationship between the center of gravity and the position of the pivot foot.
For example, in the walking pose shown in the diagram above, the foot on the ground when viewed from the front is positioned so that it looks like walking on the body’s axis.
If the relationship between the positions is not aligned in this way, it will look like a bad posture or a balance that is about to fall to one side.
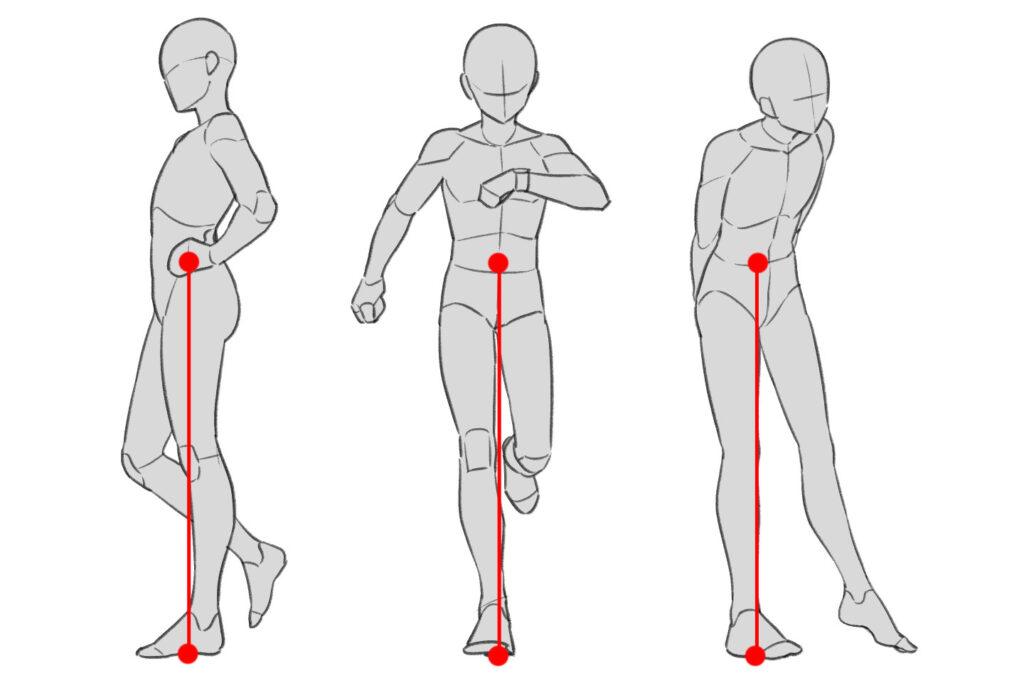
Change the relationship between the center of gravity and the position of the pivot foot according to the speed of movement.
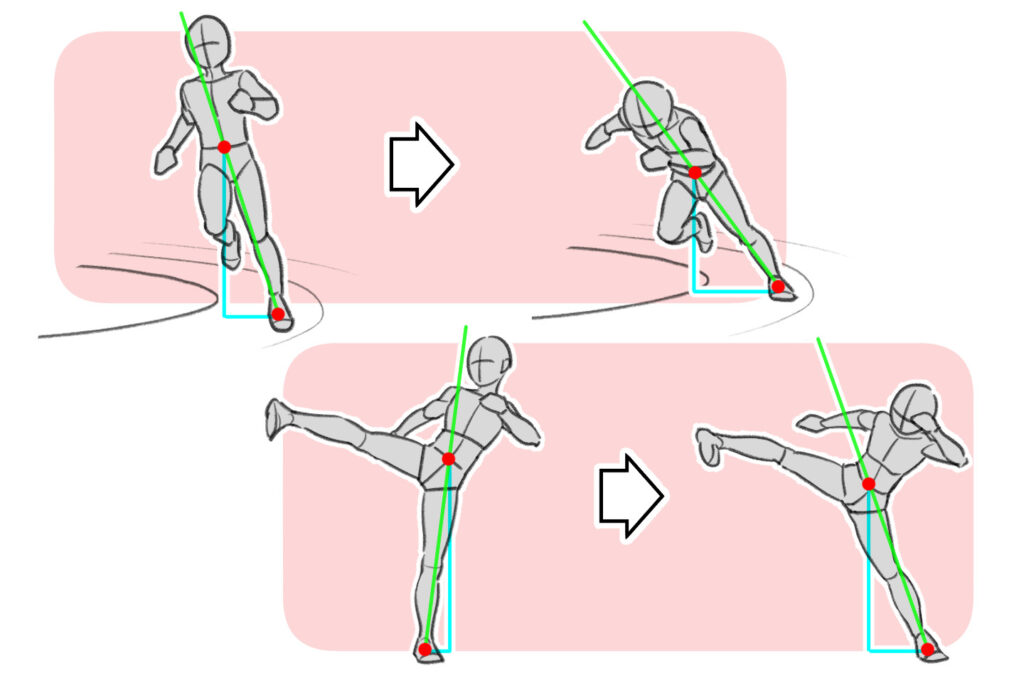
The greater the angle of the line (axis) connecting the center of gravity and the position of the pivot foot, the more dynamic the pose will appear.
Let’s check this out in the diagram above.
When the body is moving quickly, there is no need to support the entire body weight with the pivot foot, so the position of the pivot foot and the center of gravity will be greatly offset.
When you want to express quick or large movements, try being conscious about the angle of the axis.
Change the positional relationship of the center of gravity and the pivot foot according to the weight of the object.
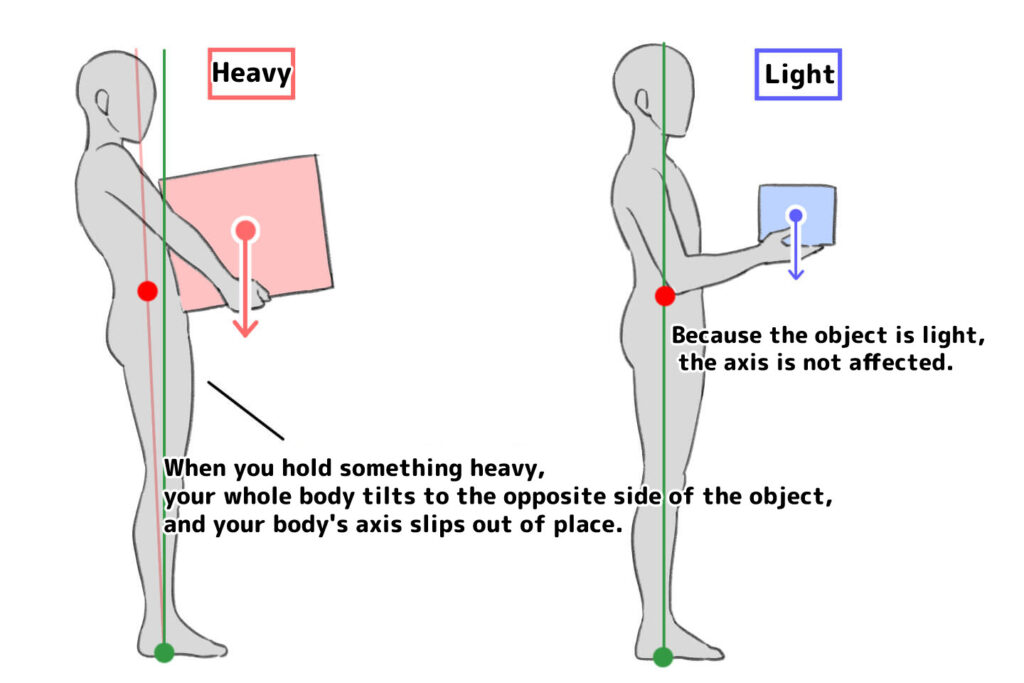
Also, the position of the body’s center of gravity and the axis changes depending on the weight of the object the figure is holding. When the character holds something heavy, the axis comes between the center of gravity of the body and the same of the object in order to support it.
When the character holds a heavy bag, the body tilts and this is also to balance the weight of each item around the axis.
How to master the center of gravity and draw natural poses
By drawing poses with an awareness of the center of gravity, you can make both still and moving poses look natural.
To make your characters more lively and attractive, why not start drawing with an awareness of the center of gravity from today.
You can practice drawing the center of gravity on your own, but if you have little experience drawing pictures or you can’t get it right even if you practice, please consider our school.
At the illustration and manga school, egaco, you can practice while learning in detail so that even beginners can draw well through our individual lessons.
Pickup Articles
Category Related Articles