This article was created by the instructors at the illustration and manga school, egaco. If you’d like to brush up your skills of illustration, please refer to the official HP of our school.
To make your illustrations look more glamorous, you might want to try arranging sparkly motifs or drawing effects that look like science fiction.
Have you ever wanted to draw light effects but struggled with the shape of the motifs or the positioning?
Using the Decoration function in Clip Studio Paint, you can arrange the effects in a well-balanced way and make them shine beautifully in a composite mode.
Let’s try drawing light effects just as you imagined using the convenient functions in digital illustration!
How to draw light effects: Basic and advanced techniques explained with examples
What are light effects?

Light effects in illustrations are also used to express non-natural light.
Light, like indoor lighting, emits light with the center of the object being the brightest and the surrounding area being blurred.
In the world of fantasy, the objects that are made to shine are varied including Text, Magic, and Holograms.
*Holograms refer to a three-dimensional image recording like science fiction movies.
Please refer to the following articles if you’d like to know about various effects:
Basic: Procedures for drawing light effects!
To create beautiful light effects, draw in the following order: Rough sketch, Clean up & Adjust, and Use filters.
Step 1: Rough sketch
After deciding on the motif you want to make shine, start drawing.
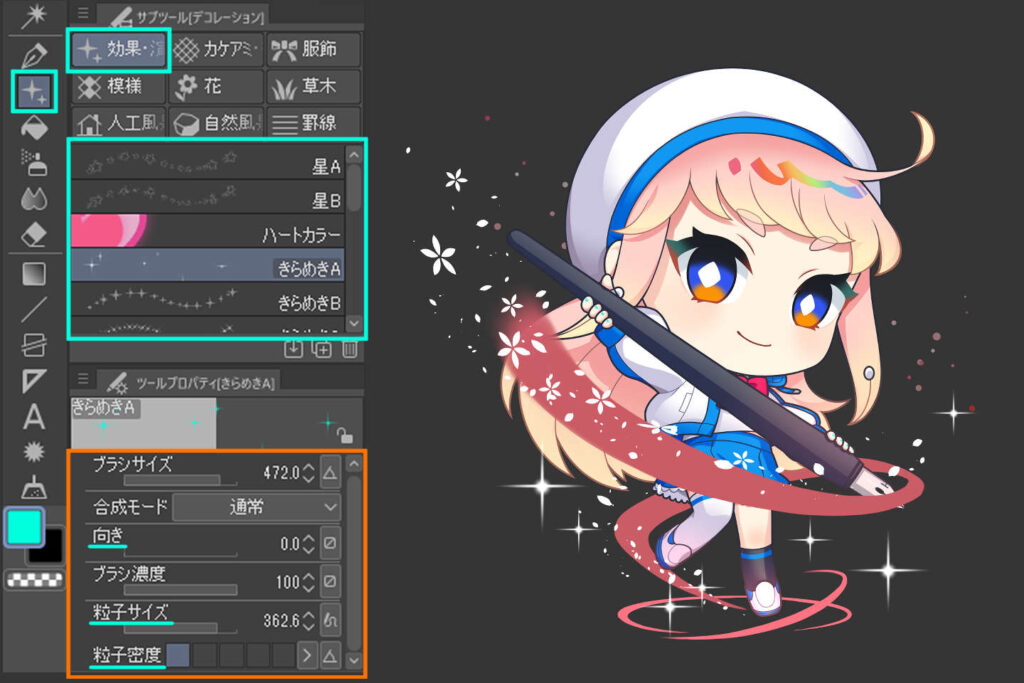
In the Decoration –> Effect/Direction of the toolbar, there are various effects such as star shapes, so try placing them to see what happens.
- Particle Size → The size increases
- Particle Density → The distance between motifs can be increased
- Orientation → The angle of the motif can be changed
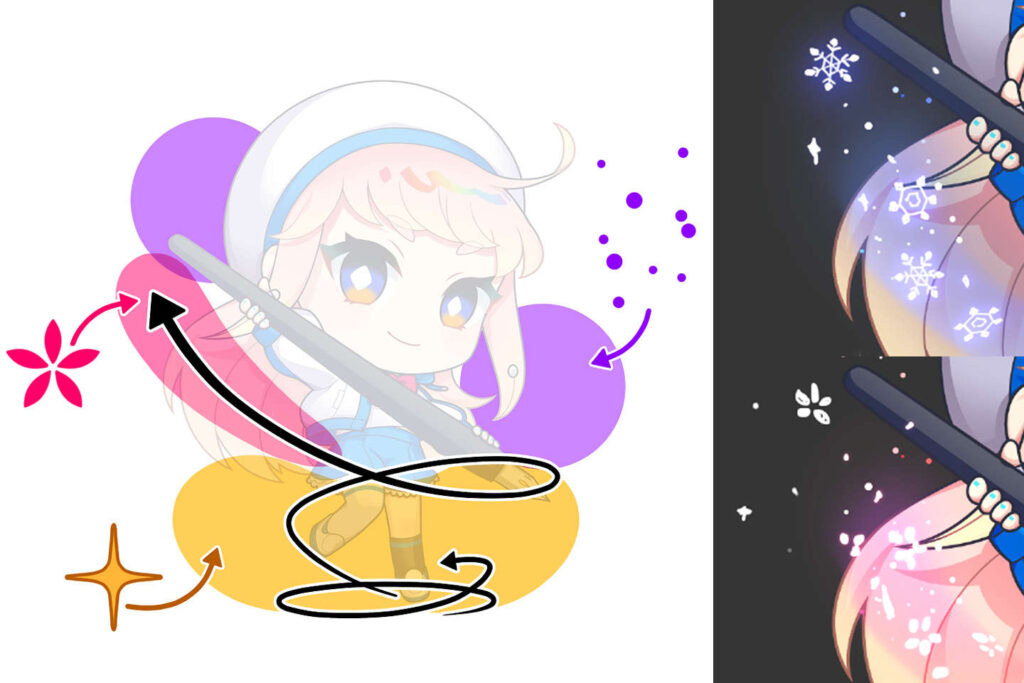
The trick to arranging them nicely is to draw them so that they surround the characters and items; don’t add too many motifs, but add them in parts.
It’s easier to decide the motif if you’re conscious of things related to the season or the attributes.
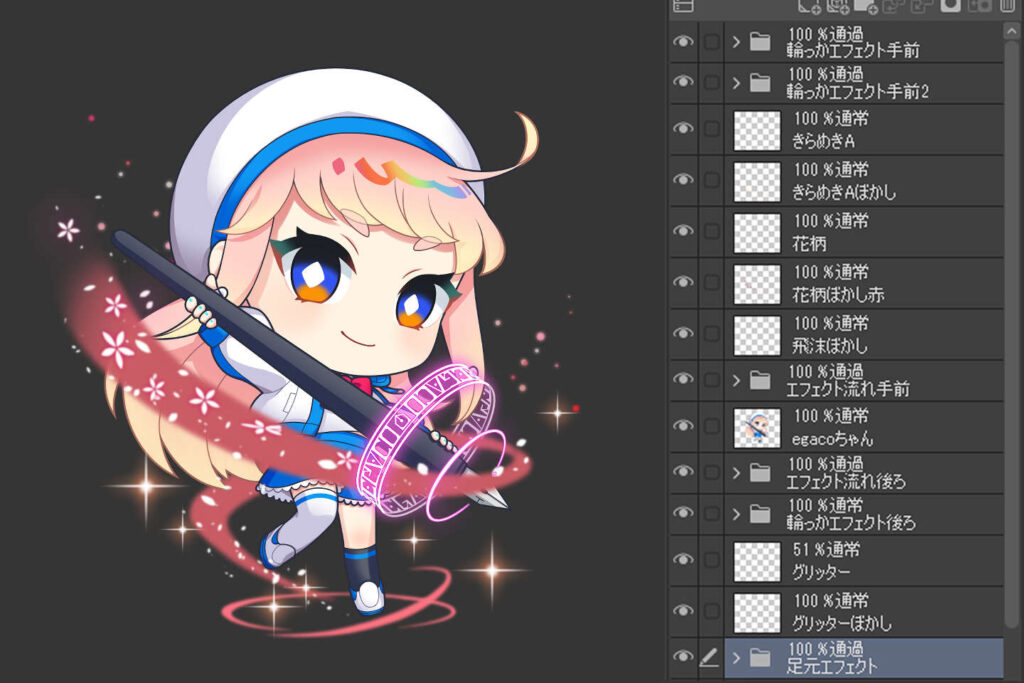
Step 2: Finalize the drawing
Use the rough sketch as a reference to add details.
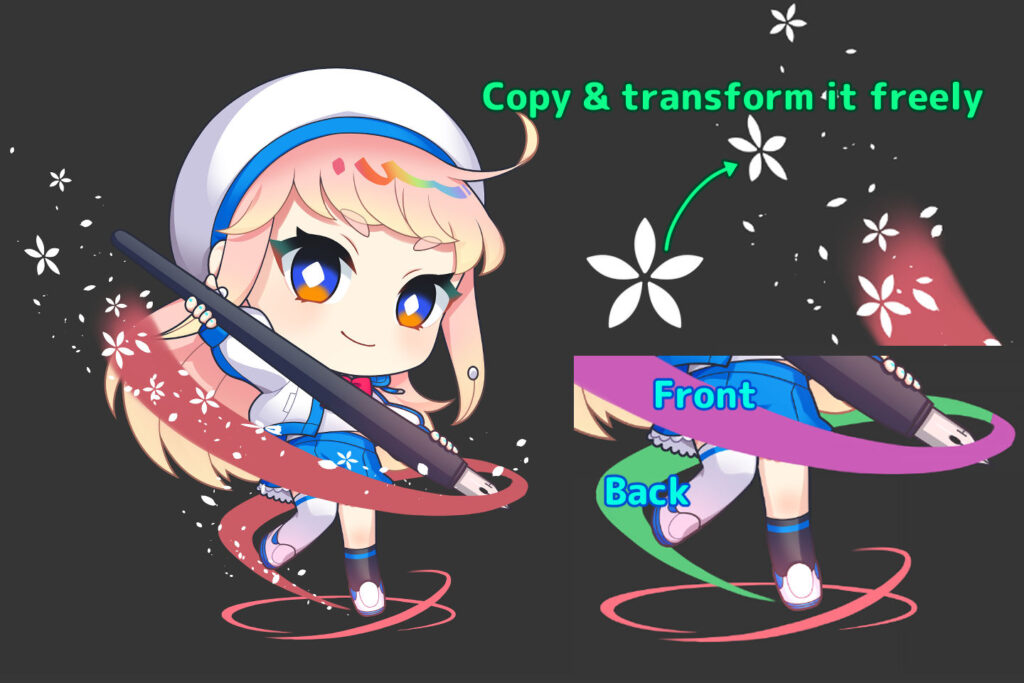
For the flower-shaped effect, duplicate the layer you’ve just drawn and place them side by side.
For the swirling effect, split the layers into front and back.
Step 3: Use decorations
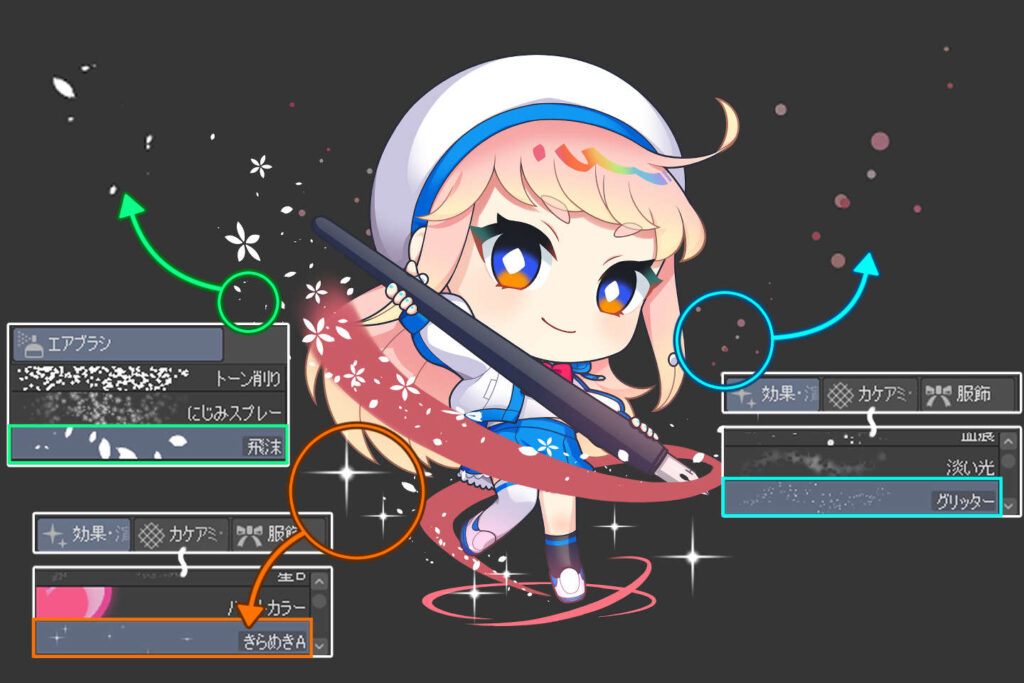
Use the Tool > Decoration > Effects & Production brush to add effects.
- Particle Size → Makes the size larger
- Particle Density → Makes the space between motifs larger
- Orientation → Changes the angle of the motif
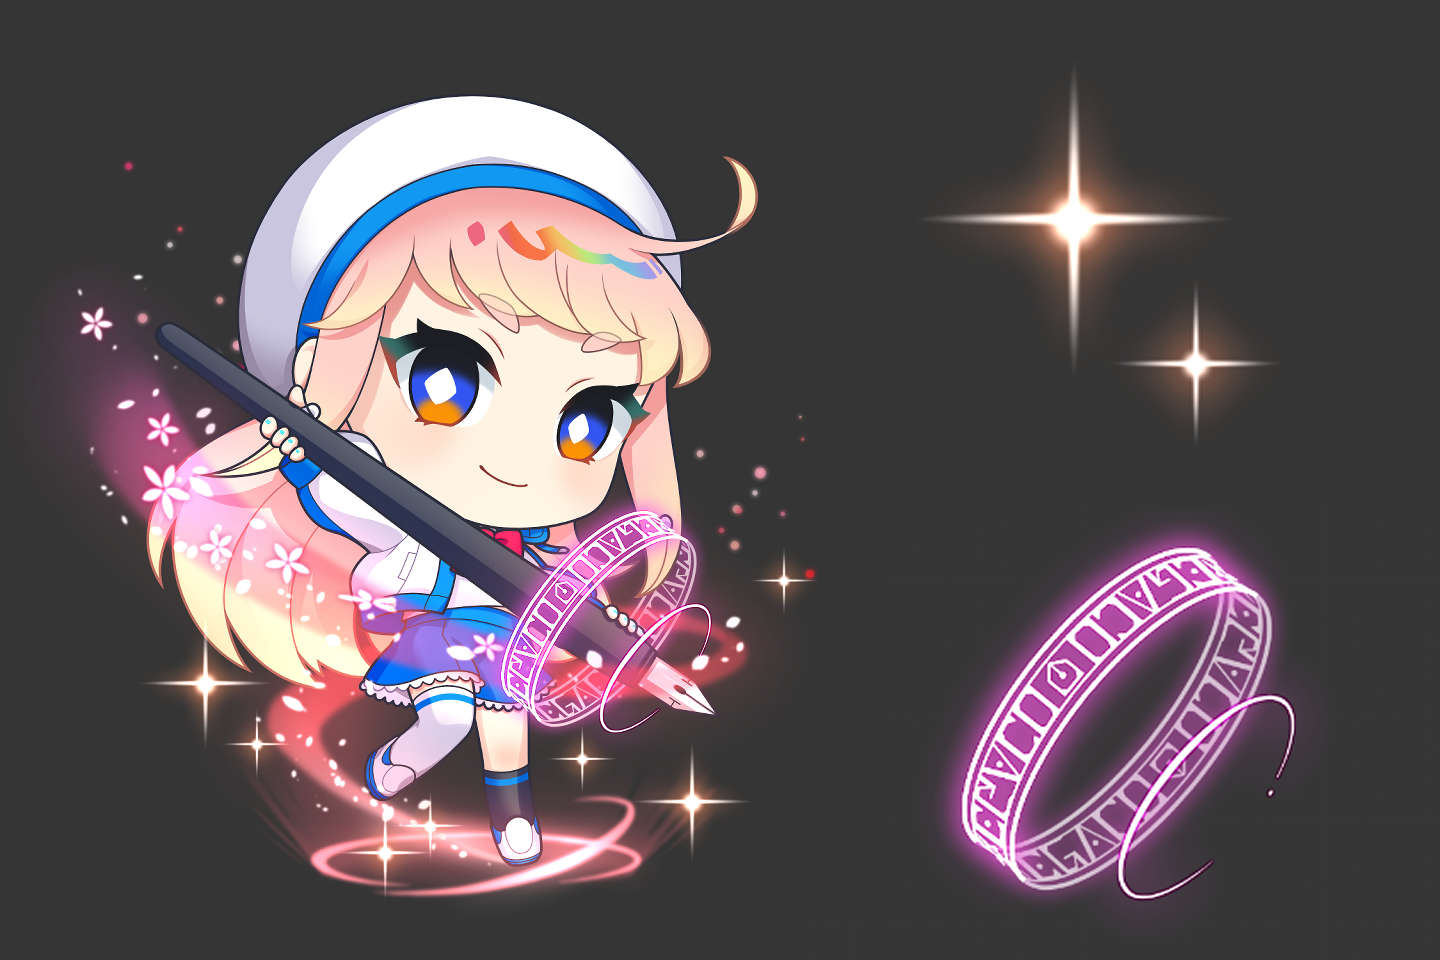
It’s easy to make chanting characters too! How to make a ring of light effect
Step 1: Create a ring using the Ellipse tool
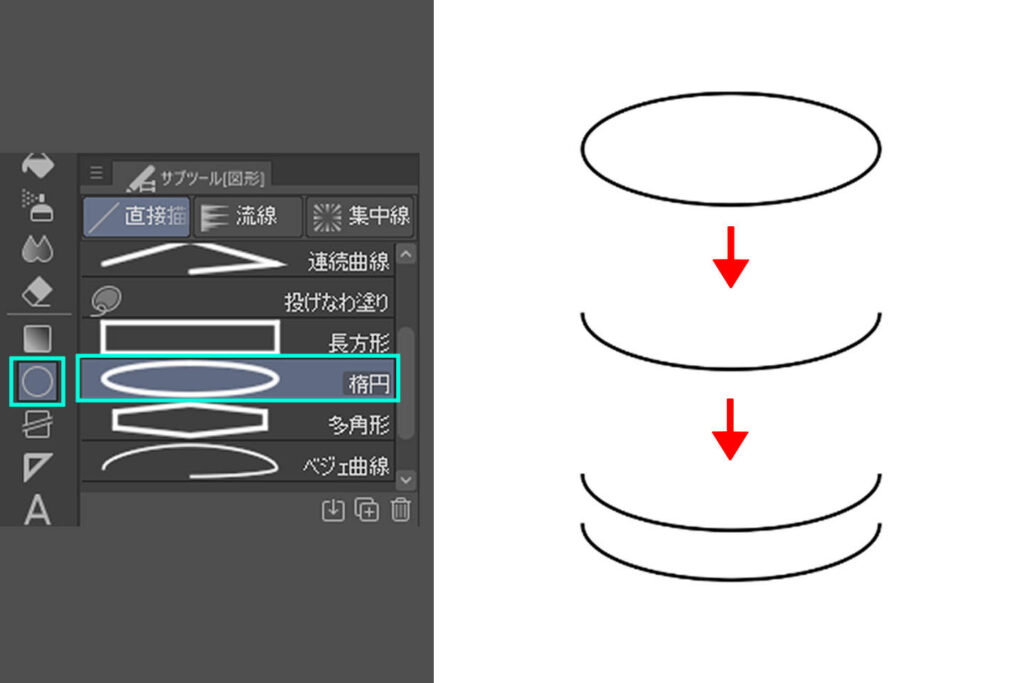
We’ll create a chanting character effect for the loop.
Create a circle using the Ellipse Tool, then delete about half of the circle and duplicate the layer.
Step 2:Duplicate the layer by flipping it upside down
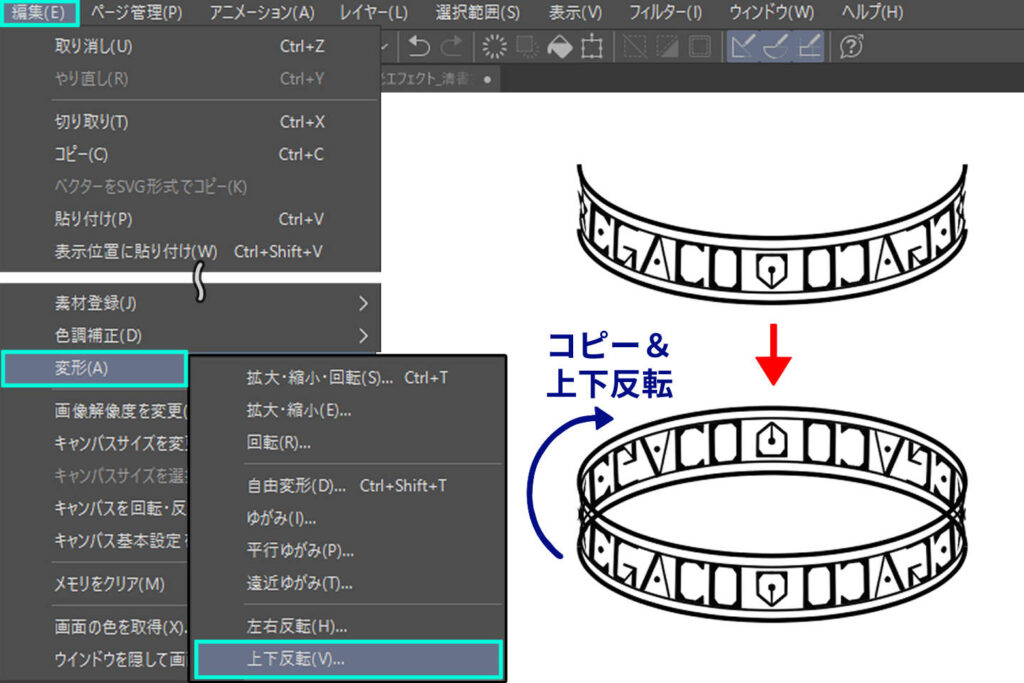
Draw characters or marks by hand.
Once you have finished, duplicate the layer, select Edit > Transform > Flip Vertical, and flip the layer vertically and overlap it.
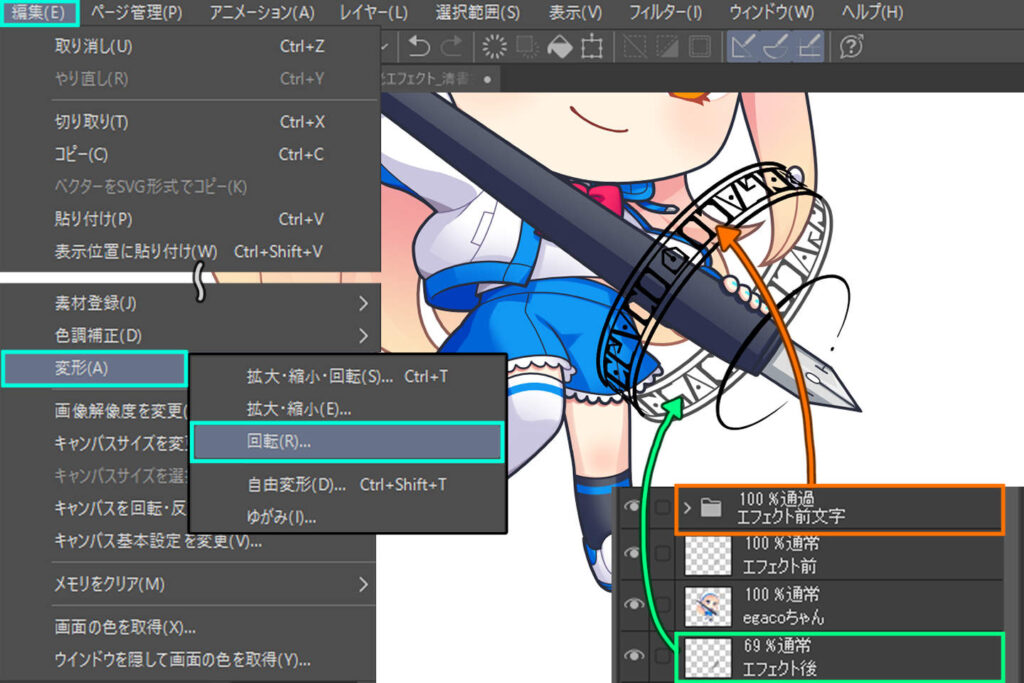
Use the Rotate tool to overlap the character.
Step 3: Apply Gaussian Blur
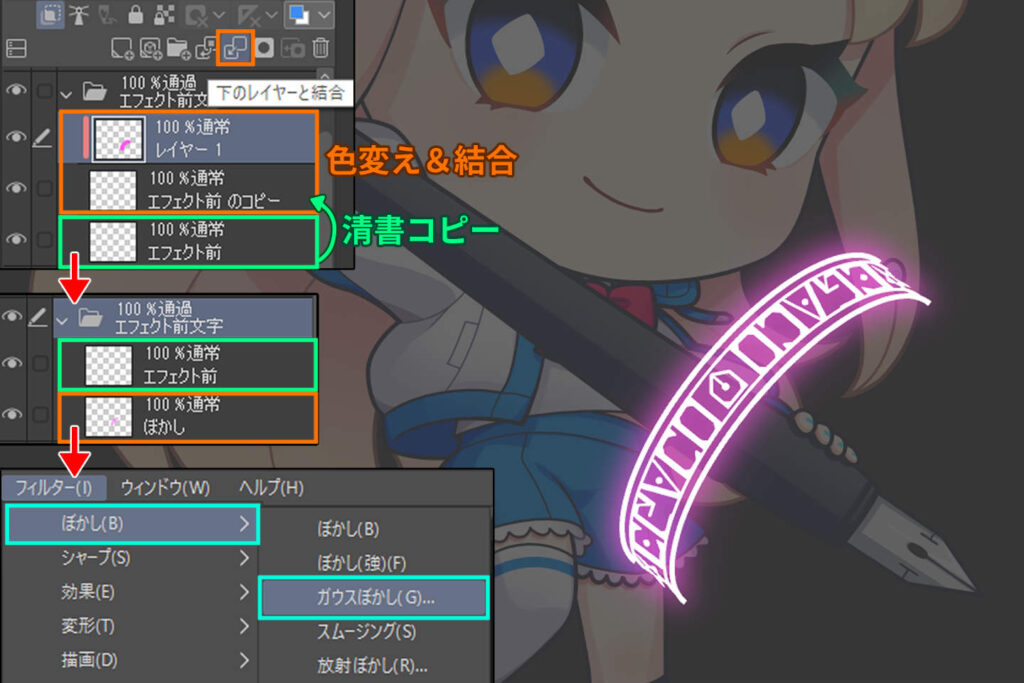
Duplicate the layer with the final draft, lock the transparent pixels, change the color, and then select Filter > Blur > Gaussian Blur.
If you increase the number, the blur range will expand, so adjust it while checking the preview.
Adjust the other effects in the same way.
Step 4: Adjust the effects using the composite mode and you’re done!
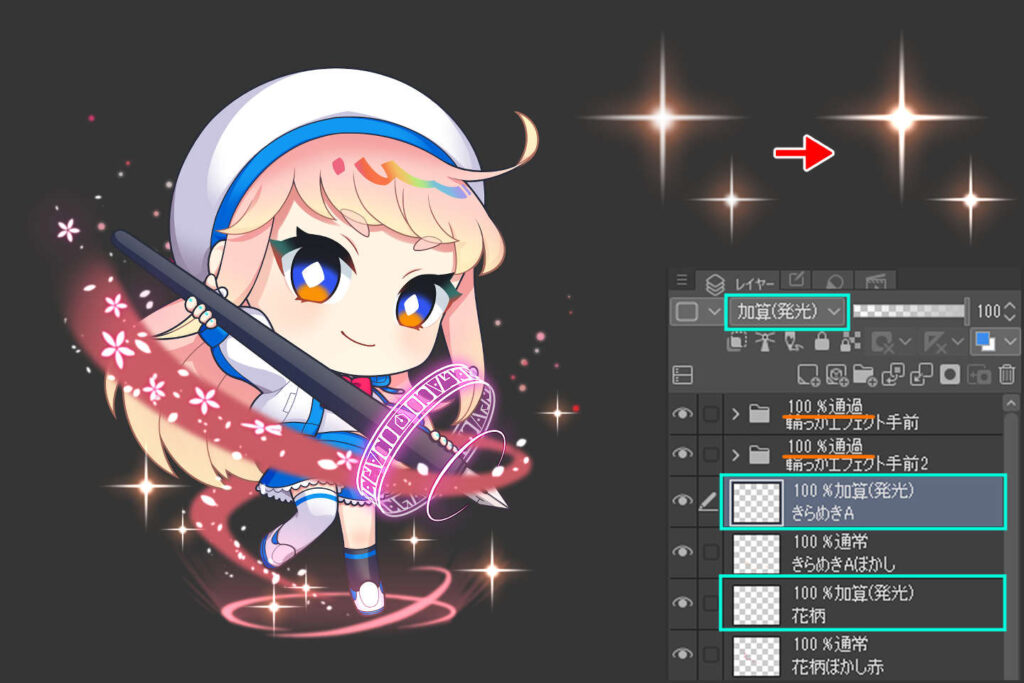
Set the composite mode of the layer bearing decorations to Add Glow.
When you put the layer using the composite mode in a folder, set the composite mode in the folder to Pass Through.
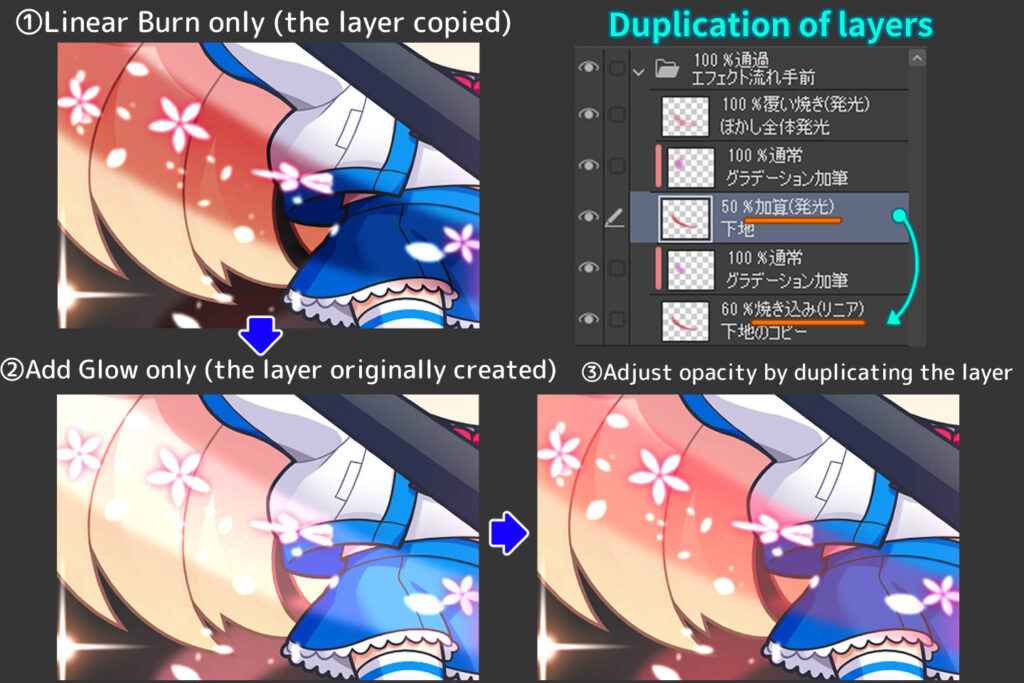
If you want to make the light effect that overlaps the person transparent, combine multiple layers that have been changed to the composite mode, and you can see the original picture underneath through.
Please refer to the below article if you’d like to know about the composite mode further
Notes and tips for drawing light effects
Be careful about where you put it
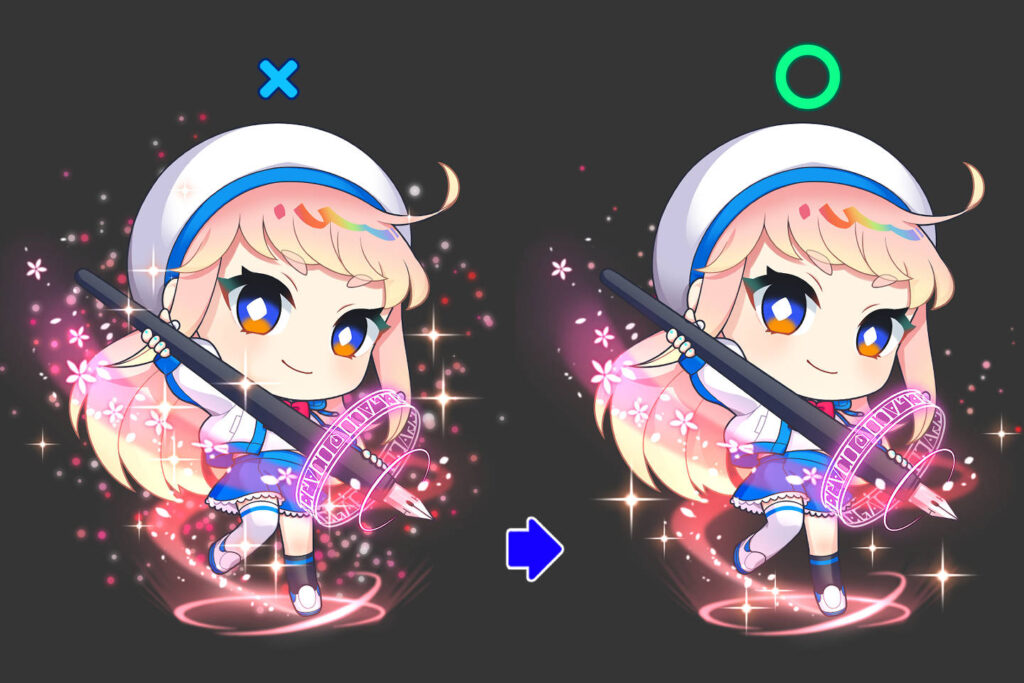
Adding effects makes it look gorgeous and glamorous, but if you overdo it, it will be hard to see the characters at a glance.
Be careful to arrange the characters so that their silhouettes are not hidden.
Applying light effects with decorations
How to draw illuminations
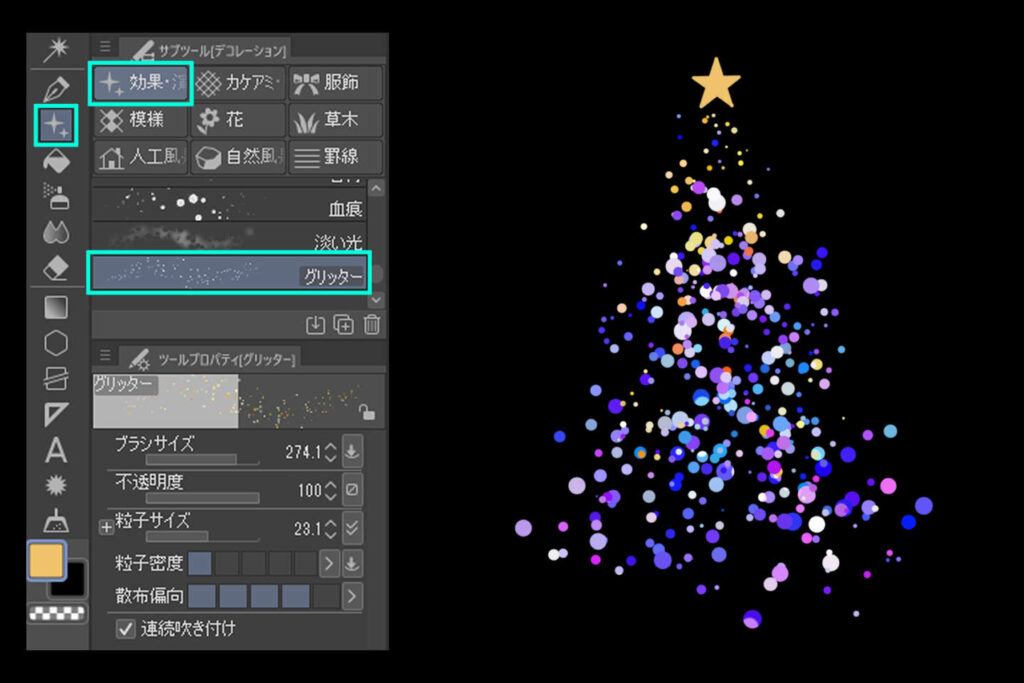
To draw illuminations, use the tool, Decoration > Effects > Glitter.
Place the particles so that they are in random sizes as you shape them.
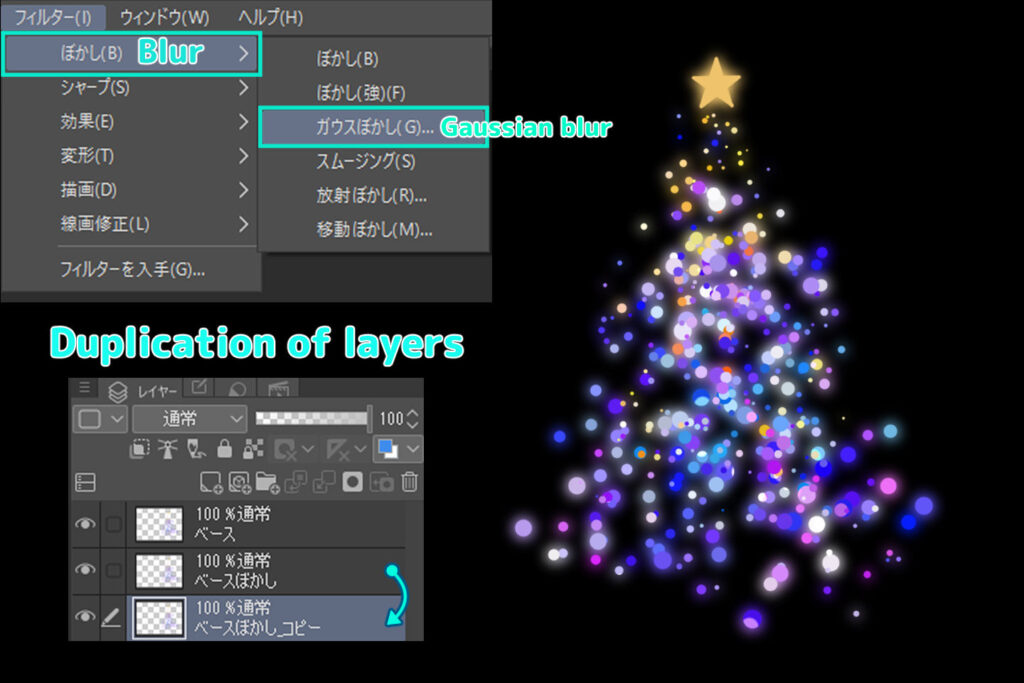
Duplicate the layers you have put in, use the tool, Folder > Gaussian Blur.
If the blur is too light, duplicate the blurred layer.
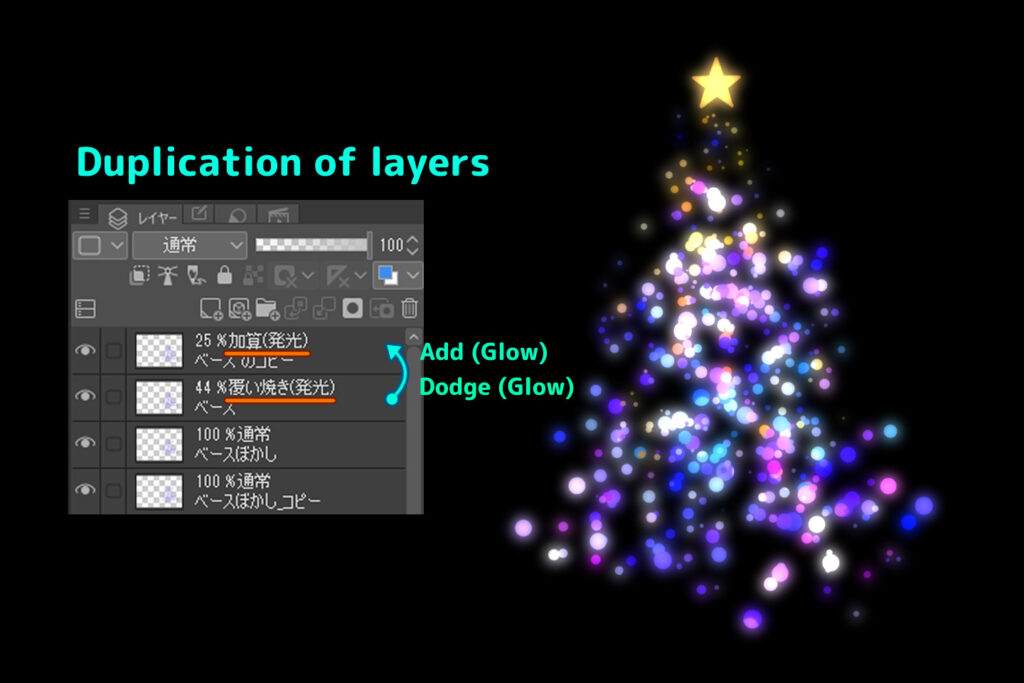
Duplicate the base layer which was not blurred, and change the composite mode to Dodge Glow or Add Glow and adjust the opacity.
Easy! How to create pale light effects
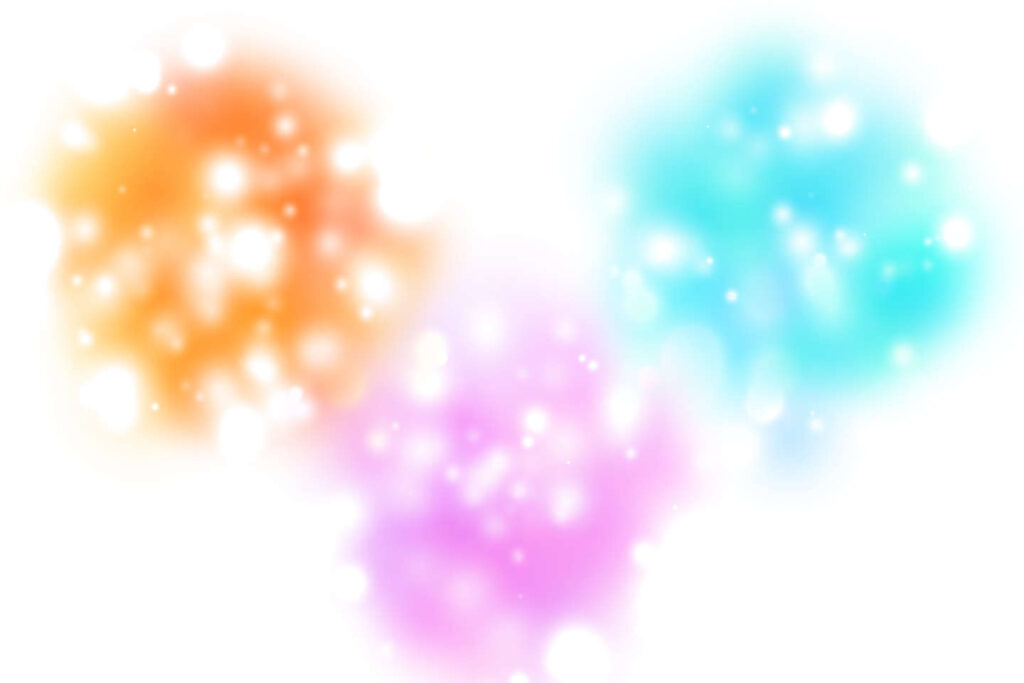
To create pale light effects, use the tool, Decoration > Effects Direction > Pale Light.
Colors that are close to the selected color are automatically mixed to produce a natural finish.
If you have trouble drawing light effects
We have explained how to draw light effects and the ways of effects expression using Clip Studio Paint.
Fantasy illustrations, for example, have many objects that can be illuminated, and there are many variations.
Using the Clip Studio Paint decorations described in this article, it is easy to create expressions that would be difficult to achieve by hand drawing.
You can search the Internet for information on how to draw effects, but at our school, we teach how to draw and apply effects directly, so that even those who are not good at digital effects can learn and acquire the techniques.
I want to draw effects that bring out the character more!
For those who are feeling like that, please consider taking a lesson at our school, too.
We recommend you to take private lessons at our illustration and manga school, egaco.
Pickup Articles
Category Related Articles